Measurement Tools and Page Scale | Drawboard PDF
Drawboard PDF includes a set of measurement tools designed for marking up and reviewing technical drawings. All measurement tools are available under the Measure tab in the toolbar and require a Pro subscription.
Before measuring, it is worth understanding how page scale works, as it affects every measurement you draw.
What is a page scale?
A page scale tells Drawboard PDF what one unit on the screen represents in the real world. For example, a scale of 1:100 means 1 mm on the drawing equals 100 mm in reality.
When a page has a scale set:
- Every measurement tool you use on that page measures at that scale automatically. You do not need to reselect a scale for each measurement.
- The current scale is shown in the scale indicator at the bottom-left of the canvas.
- If you update the page scale, every existing measurement on that page that uses the page scale is recalculated automatically to reflect the new scale. You do not need to redraw anything.
A page can also be unscaled, which displays as 1:1 (Unscaled). Measurements on an unscaled page are reported in page units at 1:1 until you set a real scale. Every page starts unscaled by default.
If your measurements look incorrect, the most common cause is that the page scale has not been set, or was set to the wrong value. Check the scale indicator at the bottom-left before drawing measurements.
The scale banner
When you select a measurement tool on a page that has no scale set, a banner appears at the top of the screen. This is a prompt to confirm or set your scale before you start drawing, so your measurements are accurate from the start.
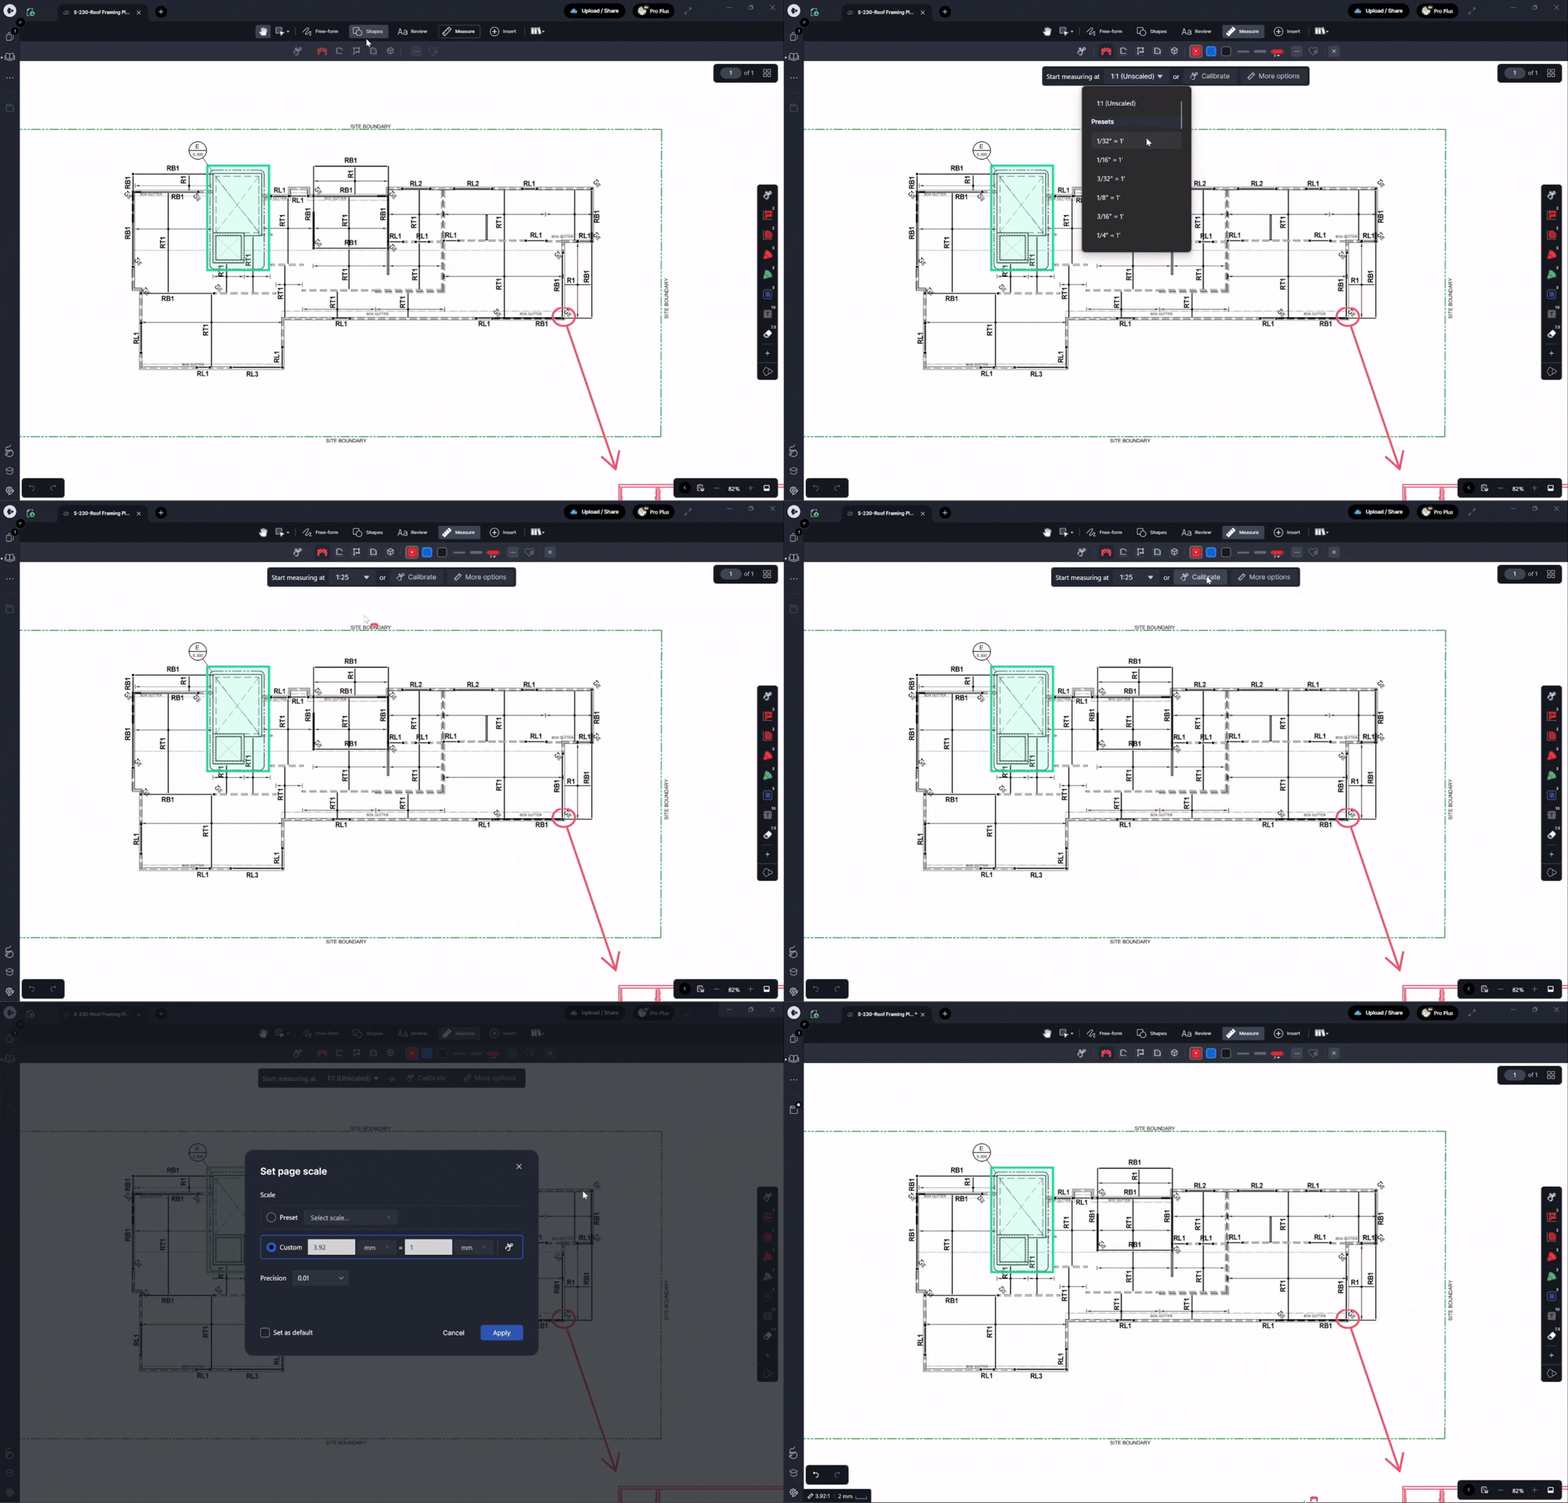
The banner gives you three options:
-
Scale dropdown: shows the scale that will be applied if you start drawing immediately. This defaults to the page's last-used scale, or 1:1 (Unscaled) if none has been set. Open the dropdown to pick a different scale from your recently used scales or the full preset list.
-
Calibrate: takes you straight into the calibration flow to trace a known distance on the drawing. Once you finish calibrating, your original measurement tool is automatically reselected so you can continue. If you cancel mid-calibration, you return to the banner with the tool still active.
-
More options: opens the full Set page scale dialogue, where you can choose a preset, enter a custom scale, set precision and units, and choose which pages the scale applies to.
The banner disappears as soon as you draw your first measurement. If the scale shown is already correct, you can ignore the banner and start drawing straight away.
The scale dropdown
The dropdown is ordered to help you find the right scale quickly:
- The current page scale (or 1:1 (Unscaled)) shown at the top, so you can confirm what is active at a glance.
- Your 5 most recently used scales, so common scales are one tap away. These are remembered per device.
- All available preset scales, for picking a standard scale directly.
Setting a page scale
Open the Set page scale dialogue from More options on the banner, or by tapping the scale indicator at the bottom-left of the canvas. From here you can set the scale in three ways:
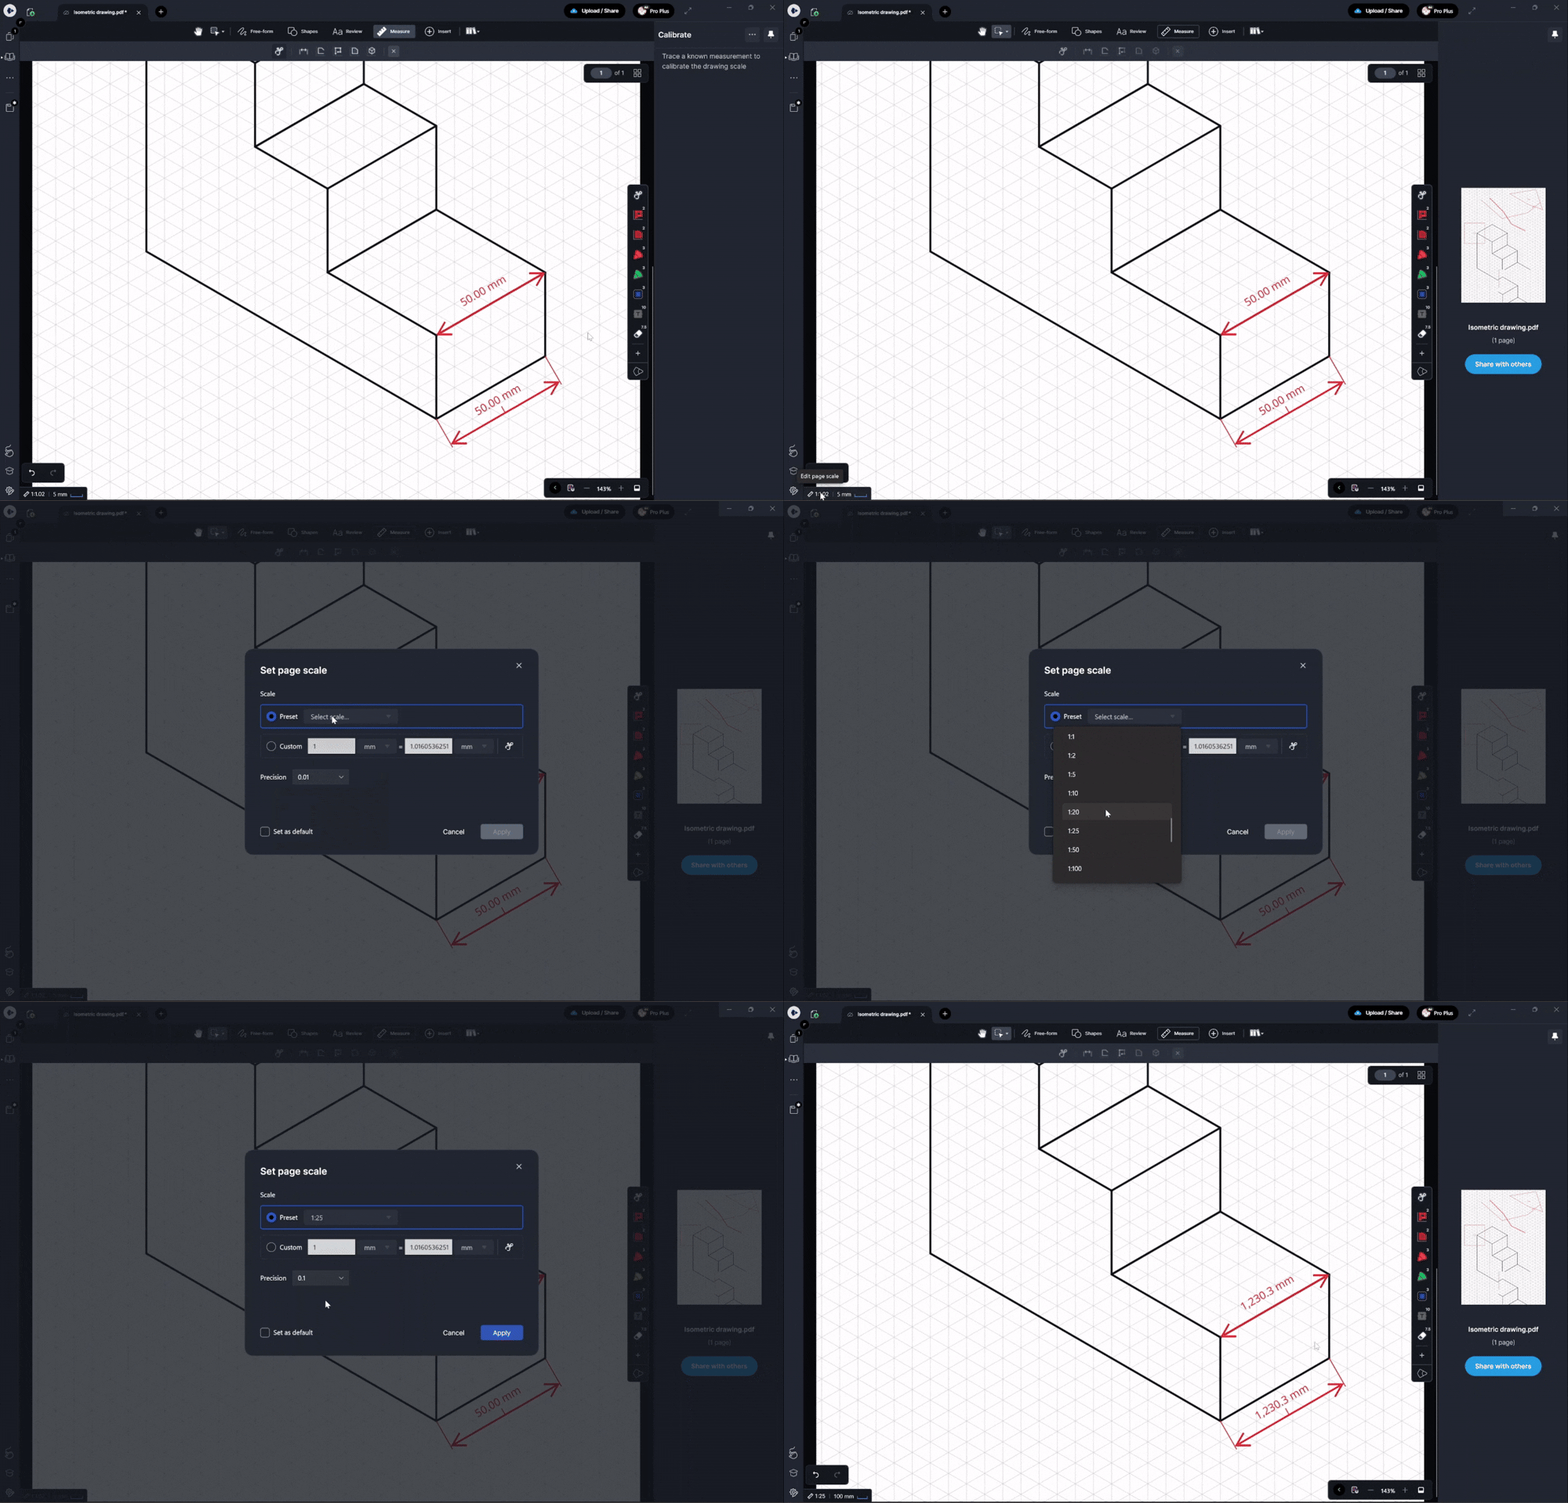
Choose a preset scale
Pick from the built-in list of common metric and fractional imperial scales. You can start typing to jump directly to a scale. For example, typing 3/32 jumps to and selects 3/32" = 1'-0". This is the fastest option if your drawing uses a standard scale.
Enter a custom scale
If the scale is not in the preset list, type it in directly. For example, 0.25 in = 1'-0". Custom scales are stored and displayed exactly as you entered them. A scale of 1" = 1" will always read as 1" = 1" and will never be automatically converted to other units.
Precision and units
Choose the display units and precision for all measurements taken at this scale. For example, 1/4" precision for imperial drawings, or 0.01 m for metric. This affects how measurement captions are displayed on the drawing, not the underlying scale value.
Apply the scale to one or more pages
When saving, you can choose which pages the scale applies to:
-
This page — applies only to the current page. The button shows the page number, for example This page (4).
-
All pages — applies the same scale to every page in the document. Useful for drawings where all sheets share the same scale.
-
A selected subset of pages — lets you pick specific pages to apply the scale to.
If your document has multiple sheets at different scales, apply the scale page by page rather than using "All pages" to avoid overwriting scales you have already set on other pages.
Set as your default for new drawings
Turn on Set as default for new drawings to have this scale pre-selected the next time you open a measurement tool on an unscaled page. This is useful if you consistently work at the same scale. You can clear or change your default at any time from Settings.
Calibrating a page scale
If the drawing's scale is not printed on it, or the document has been scanned and may not be to scale, you can calibrate manually by tracing a distance you already know the real-world length of — for example, a dimension already shown on the sheet.
You can start calibration from three places: the Calibrate tool in the Measure tab, the scale banner, or the Set page scale dialogue.
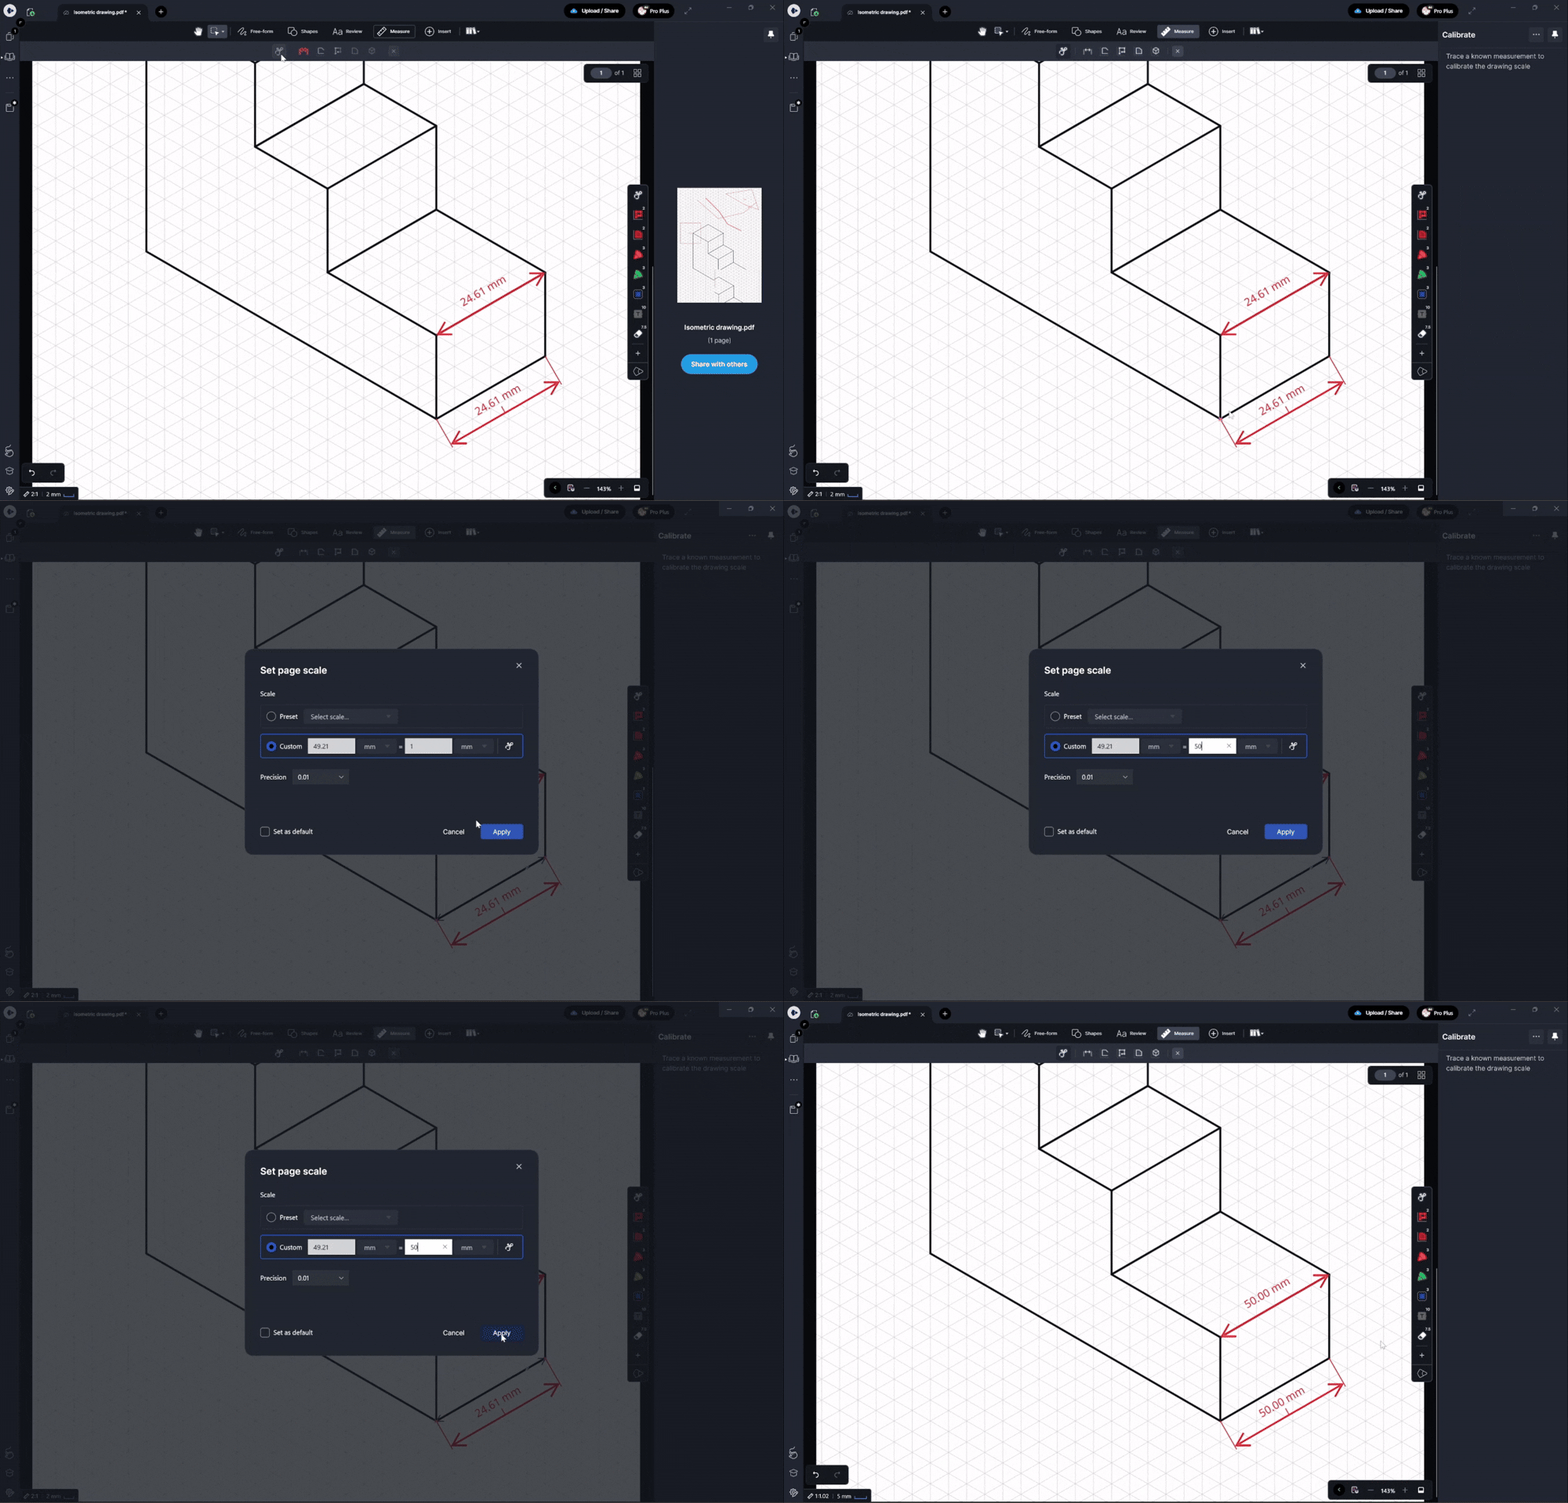
- Select the Calibrate tool from the Measure tab, or choose Calibrate from the banner or the Set page scale dialogue.
- Click or tap and drag along a distance on the drawing that you know the real-world length of. For example, a printed dimension such as 300 mm or 15'.
- Enter the real-world distance that line represents, for example
1.5 m or 3' 4".
- Choose the display units and precision for measurements at this scale.
- Choose which pages to apply the calibrated scale to, and optionally set it as your default.
- Save. If you started from a measurement tool, that tool is automatically reselected so you can carry on measuring.
For the most accurate calibration, trace the longest known distance available on the sheet. Longer reference lines reduce the effect of any small inaccuracies in where you click.
The scale indicator
On any page that has a scale set, the current scale is shown in the indicator at the bottom-left of the canvas. It displays:
- The scale value, for example
1:100 or 1" = 20'.
- A graphic scale bar: a small labelled ruler that stays accurate as you zoom in and out, giving you a quick sense of real-world distances on the page.

If the page is unscaled, the indicator reads 1:1 (Unscaled) with "Unscaled" in bold, making it clear that no real-world scale has been applied. If you deliberately set a 1:1 scale (as a conscious choice rather than leaving it unscaled), the indicator shows 1:1 without the "Unscaled" label.
To change the scale at any time, tap or click the indicator to open the Set page scale dialogue.
Changing a page scale later
You can update a page's scale at any time by tapping the scale indicator. When you do, all measurements on that page that use the page scale are automatically recalculated to reflect the new value. You do not need to redraw any measurements.
Changing the page scale will update all existing measurements on that page. If you only want to change the scale for new measurements going forward, be aware this is not currently supported. The page scale applies to all measurements on the page.
All tools are available from the Measure tab in the toolbar. You can also add frequently used tools to your favorites bar for quicker access. The available tools are:
Length Shift + Alt + L
Measures a straight line between two points in any direction. Use this for single linear dimensions such as wall lengths, door widths, or setback distances.
To use this tool:
- Select the Length tool from the Measure tab.
- Set any properties you want to apply (caption position, line style, leader length).
- Click and drag to draw a straight line from your start point to your end point.
- Release to finalise. The measurement caption will appear on the drawing.
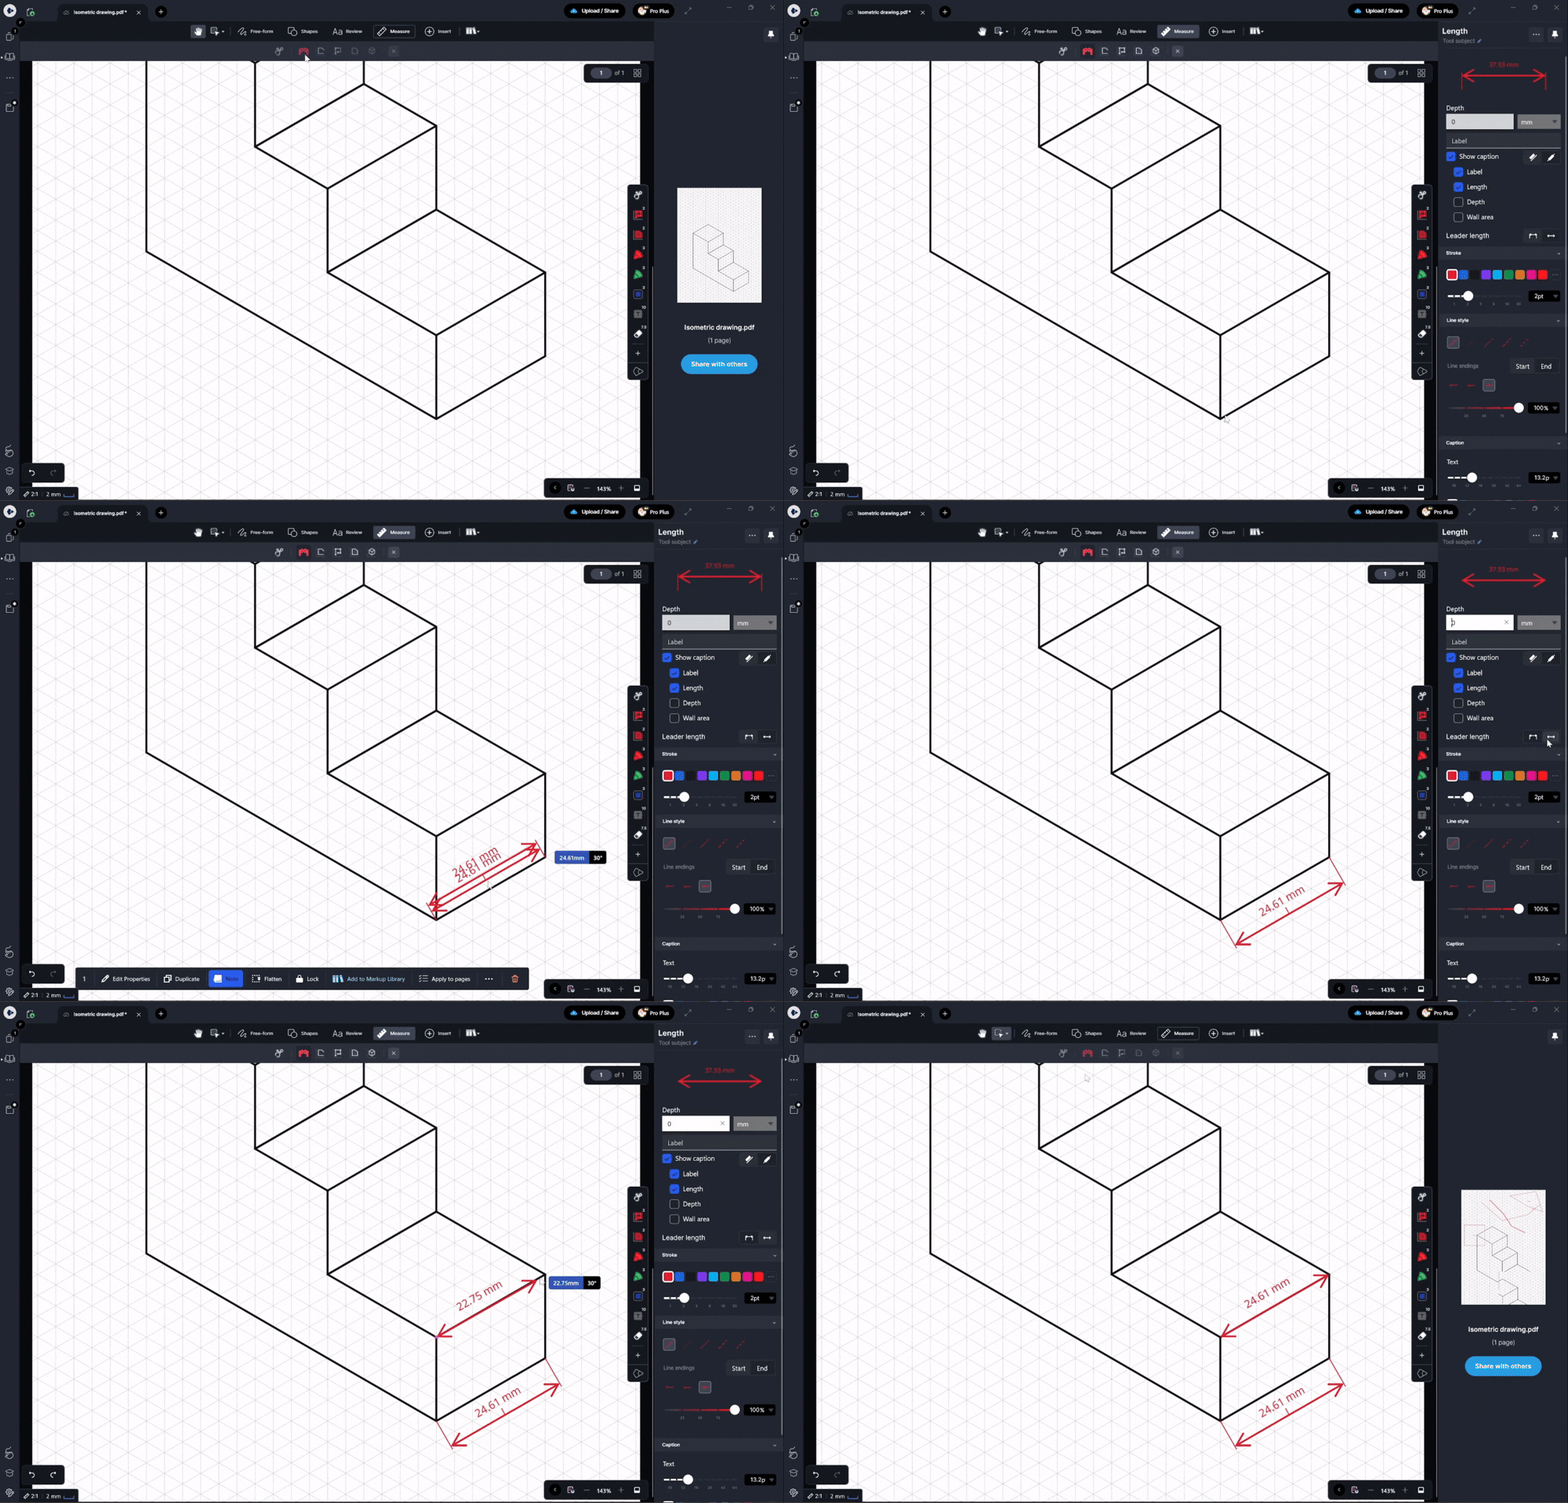
Length properties:
-
Caption position: place the caption above or below the measurement line. Defaults to above.
-
Leader length: adds a leader line extending from the end of the measurement, useful when the annotation needs to be offset from a busy area of the drawing.
-
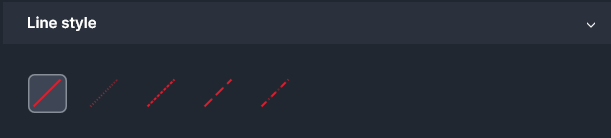
Line style: change the appearance of the measurement line.
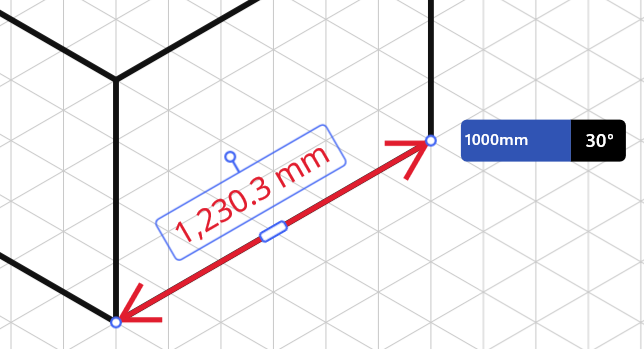
On Windows only: you can manually edit the length value and angle of a measurement by tapping the caption field and typing the updated value. If you are using a stylus, double-tap the field and write your value.
Perimeter Shift + Alt + P
Traces a closed shape and calculates its total perimeter. You can also display individual segment lengths within the same annotation, which is useful for reviewing room perimeters or boundary lengths without drawing multiple separate measurements.
To use this tool:
- Select the Perimeter tool from the Measure tab.
- Tap to set your starting point on the drawing.
- Tap each subsequent point along the outline you want to trace.
- Double-tap on the last point to close and finalise the measurement.
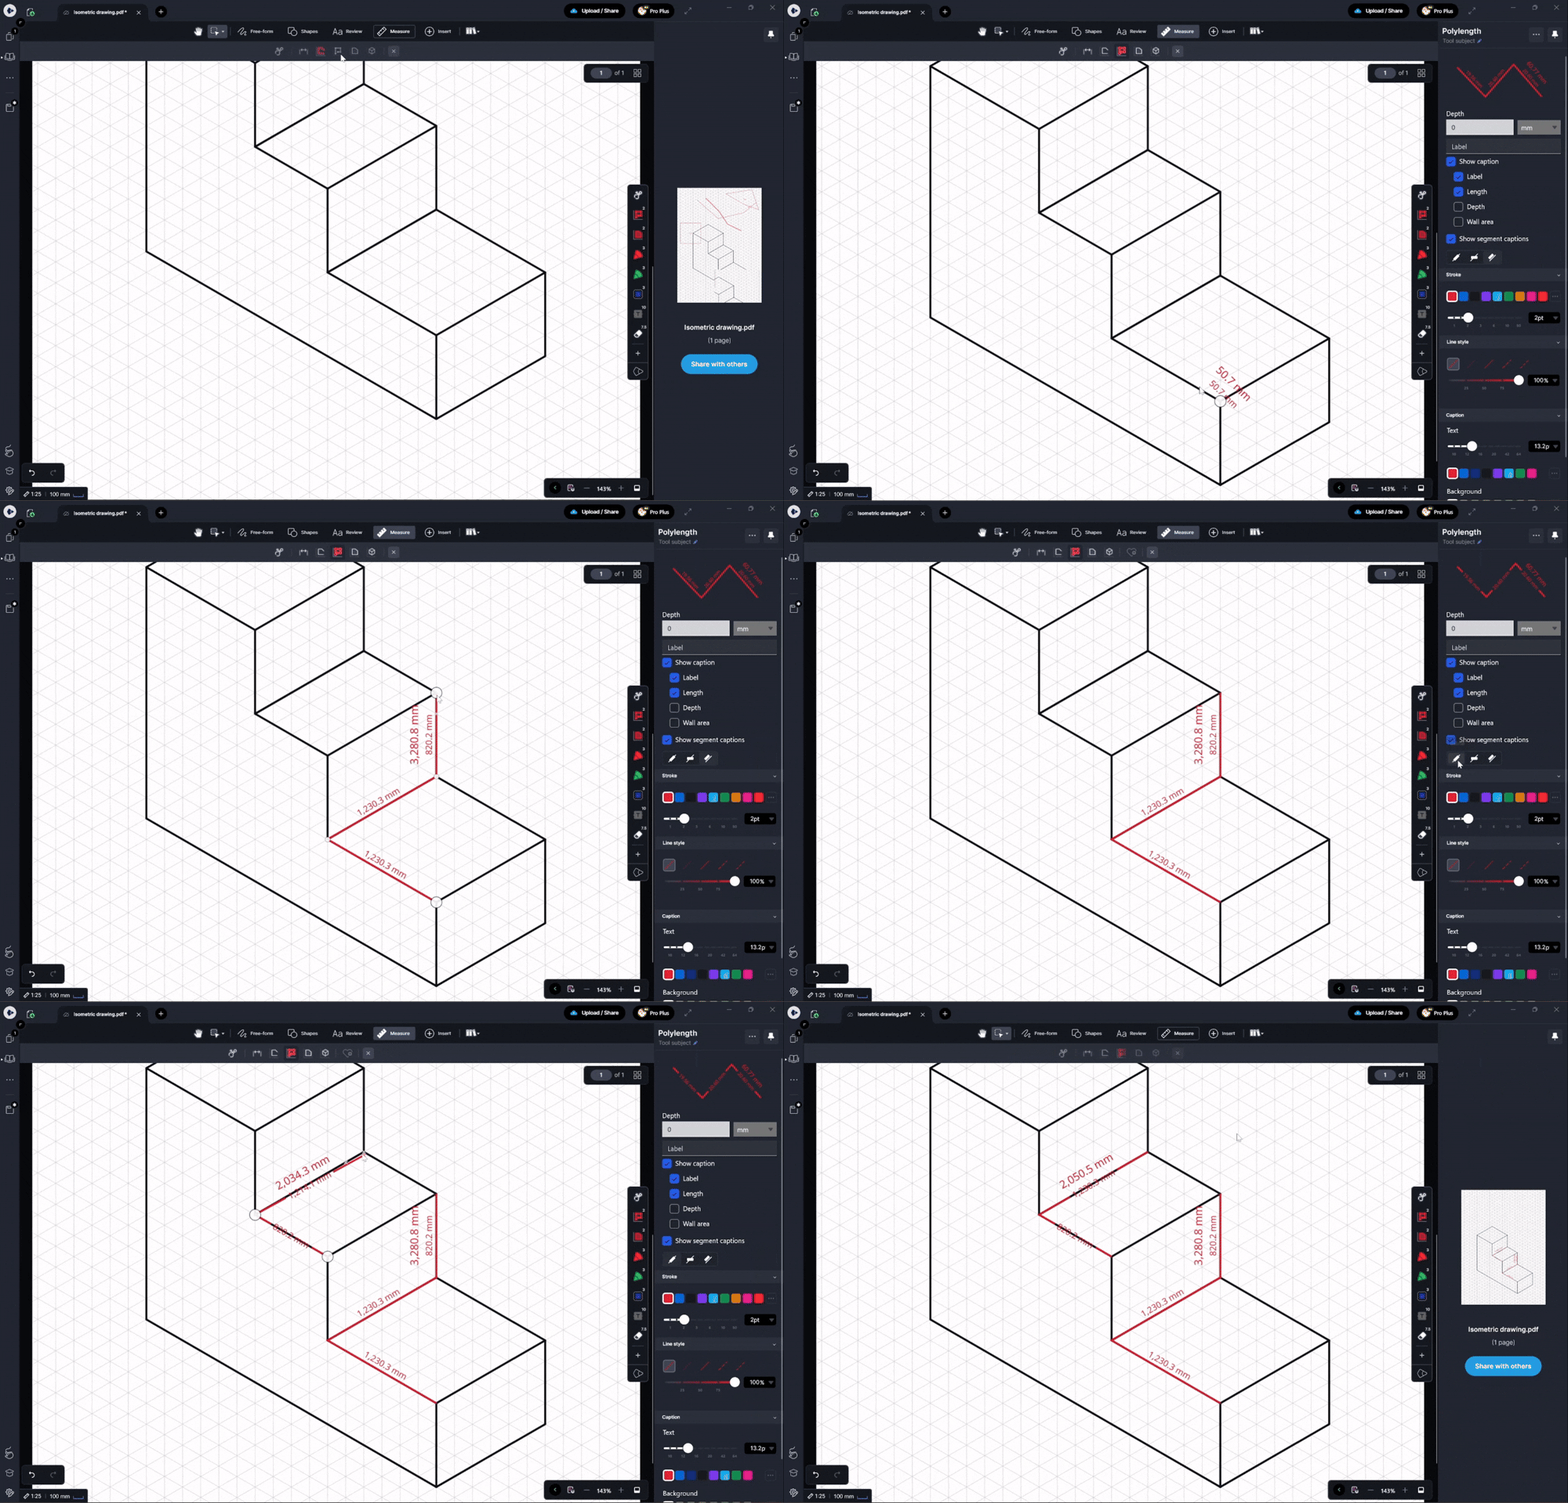
To show individual segment lengths, toggle on Show segment captions in the tool properties. Segment captions can be positioned inline, upright, or above the line.

Polylength Shift + Alt + Q
Similar to the Length tool but supports multiple connected points, creating a chain of straight segments. The caption shows the total length of all segments combined. Use this for measuring paths or runs that change direction, such as pipework or cable routes.
To use this tool:
- Select the Polylength tool from the Measure tab.
- Tap to set your starting point.
- Tap each subsequent point along the path you want to measure.
- Double-tap on the last point to finalise the measurement.
On Windows only: you can manually edit individual segment lengths by tapping the caption field for that segment and typing the updated value. If you are using a stylus, double-tap the field and write your value.
Area Shift + Alt + A
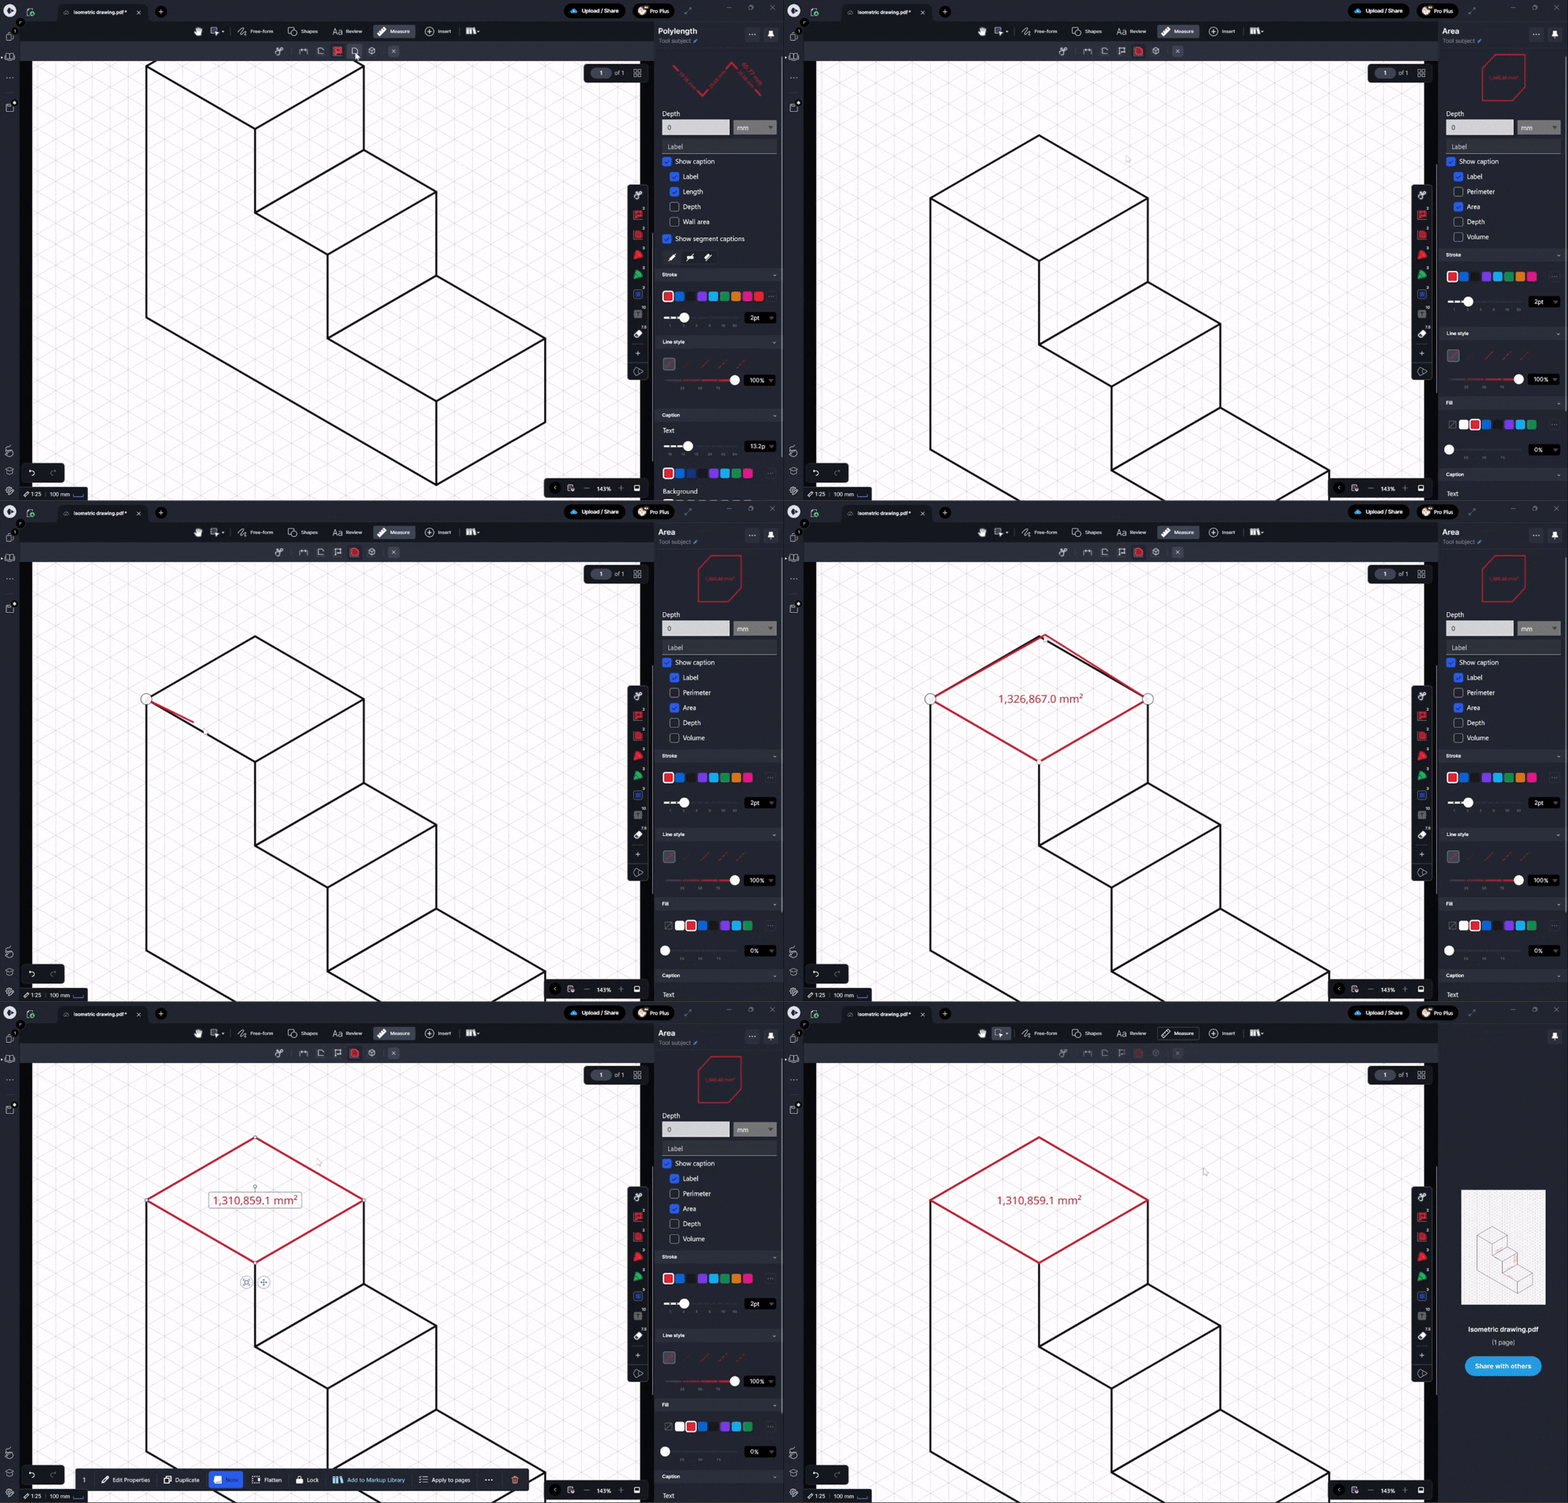
Measures the area of a rectangular or polygon region on your drawing. Use this for floor areas, site coverage, material takeoffs, or any region-based calculation.
To use this tool:
- Select the Area tool from the Measure tab.
- Draw your shape:
- For a rectangle: click and drag to define the rectangle, then release to finalise.
- For a polygon: tap to place each point of the shape. To close the shape, tap back on the first point.
Volume Shift + Alt + V
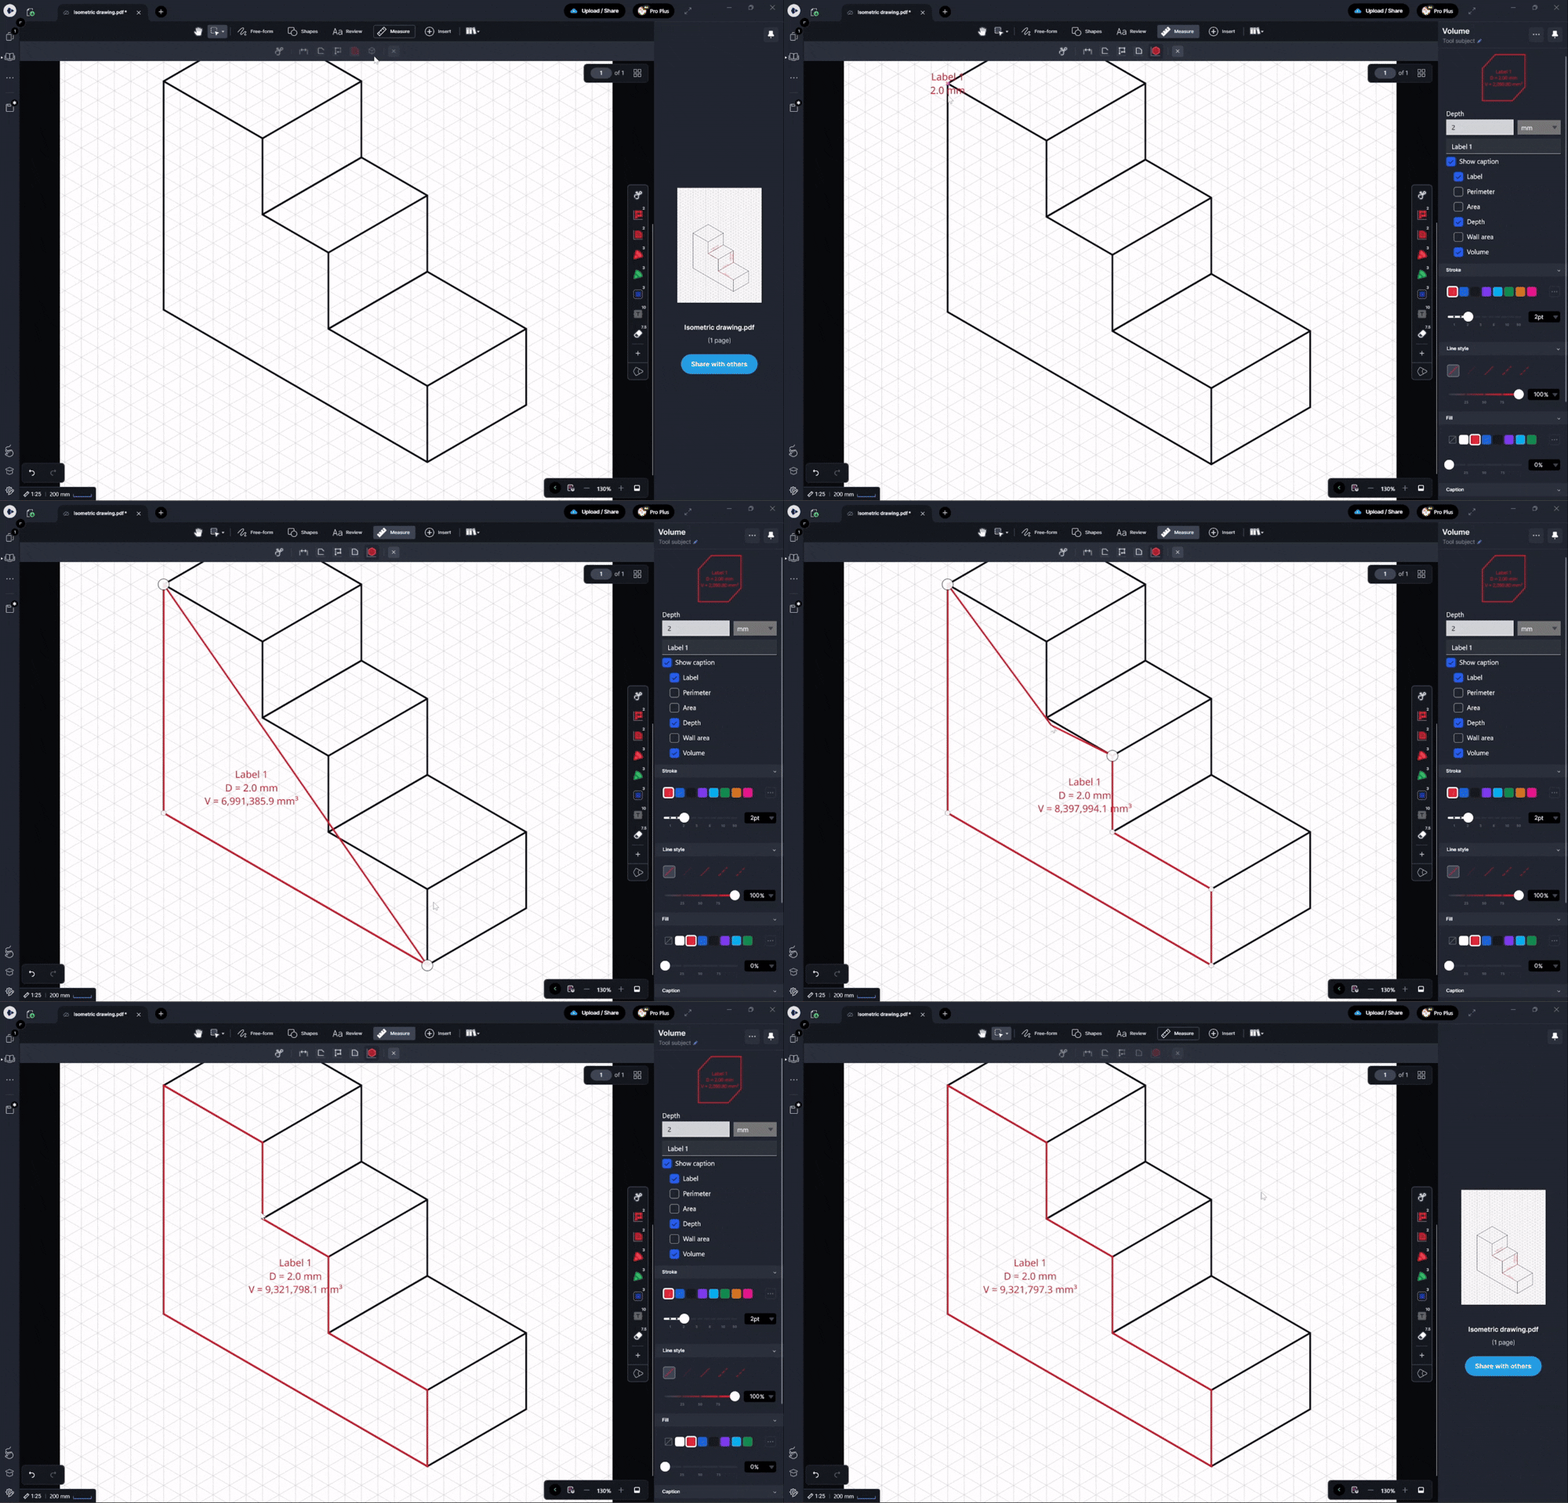
Calculates the volume of a rectangular or polygon region by combining a drawn area with a depth value you enter. Use this for concrete pours, excavations, fill quantities, or any takeoff that requires a third dimension.
To use this tool:
- Select the Volume tool from the Measure tab.
- Enter the depth value in the tool properties panel.
- Draw your shape:
- For a rectangle: click and drag to define the rectangle, then release to finalise.
- For a polygon: tap to place each point of the shape. To close the shape, tap back on the first point.
Measurement properties
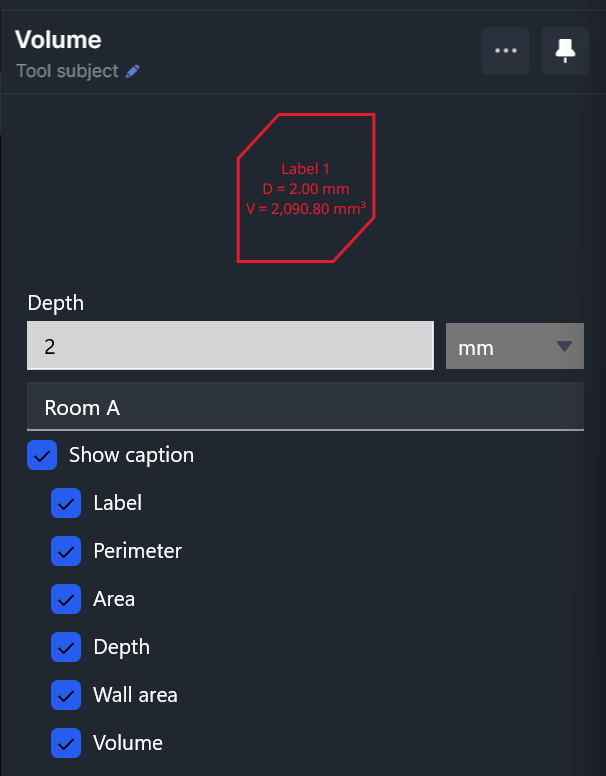
Each measurement tool has a properties panel where you can configure how the annotation looks and what information the caption displays. Properties can be set before drawing or updated by selecting an existing measurement.
The caption of a measurement can display any combination of the following, depending on the tool:
-
Label: a custom text label shown above the measurement value, useful for naming elements such as "Room A" or "Wall 1".
-
Length: the measured linear distance.
-
Depth: the depth value entered for volume calculations.
-
Wall area: the surface area of a vertical face, calculated from length and depth.
-
Area: the measured 2D area of the shape.
-
Perimeter: the total boundary length of the shape.
-
Volume: the calculated volume from area and depth.
Each tool also lets you independently adjust the stroke size and color of the annotation line, as well as the caption's text size, background color, and text color.