Available on: Web app, iOS app
Task and issue lists don’t belong in spreadsheets or emails. They belong on the drawing, right where the work happens.
With our Task Lists feature, now live in Drawboard Projects, your team can flag to-dos, assign ownership, and track status directly in your drawings and documents. Every on-drawing task and issue is location-specific, filterable, and updated in real time, without extra software or context-switching.
The Task Lists feature replaces the old Issues feature and brings the following benefits:
- Start off with two separate lists: Tasks and Issues
- Available on both drawings and documents
- Tasks can be linked to one or more drawings or documents—or left unlinked if needed
- Tasks can be created from the canvas with a pin or directly from the list view.
- Hover over pins to see at-a-glance summaries
- Enter as much or as little information as you want - all fields are optional
- Organization Admins can completely customize the Task Lists available across your account
- Full access to Task Lists via our Public API for Enterprise plan accounts
Throughout this article we mostly use the term "tasks and issues", as these are the two lists that all accounts start with. If the Task Lists in your account have been customized, e.g. you have a Punch Items list or an RFIs list or a Changes list, all of the instructions below still apply - all lists have the same capabilities.
We're just getting started. Tasks will keep getting better—with powerful additional features like support for photos and PDF reporting.

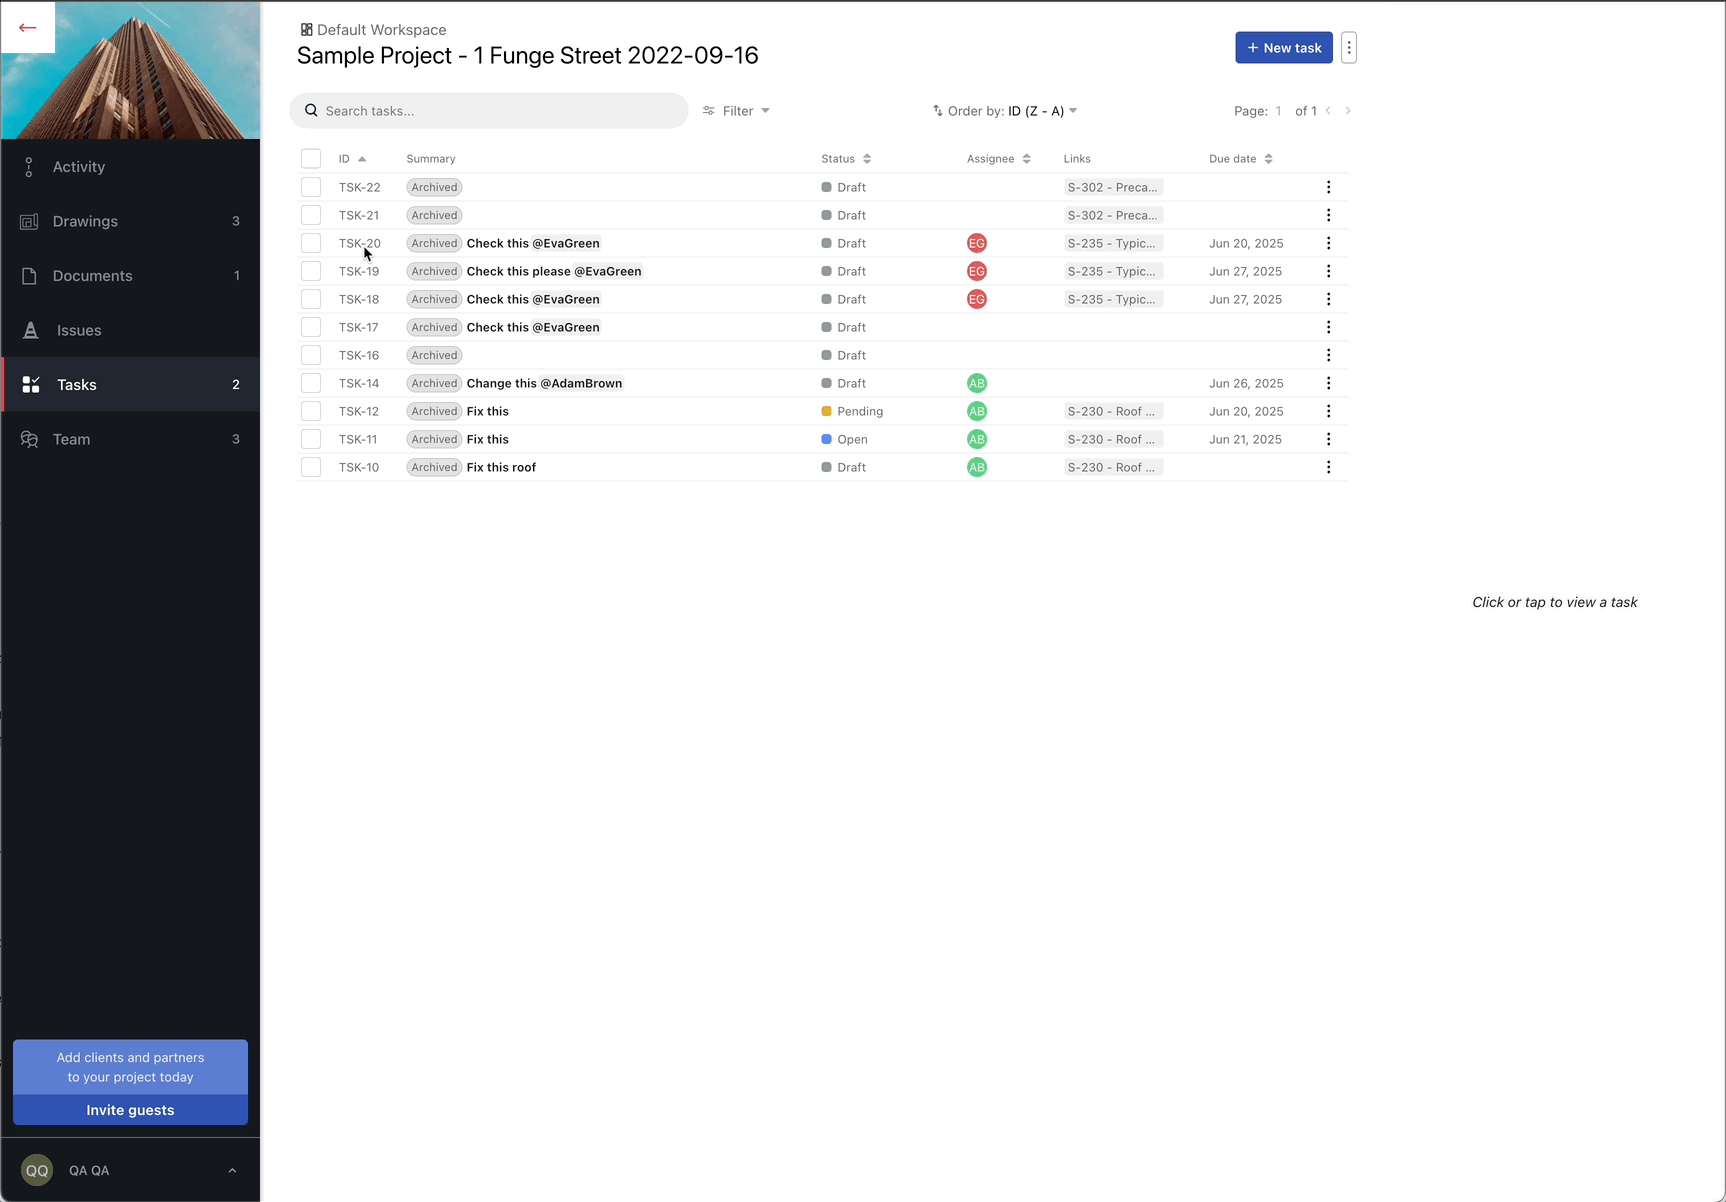
The new Tasks list
In this article, we'll show you how to:
Creating new Tasks or Issues
You can create new issues or tasks in several ways, depending on where you’re working in your project.
From the Issues or Tasks List
- Select the Issues or Tasks tab from the main projects menu.
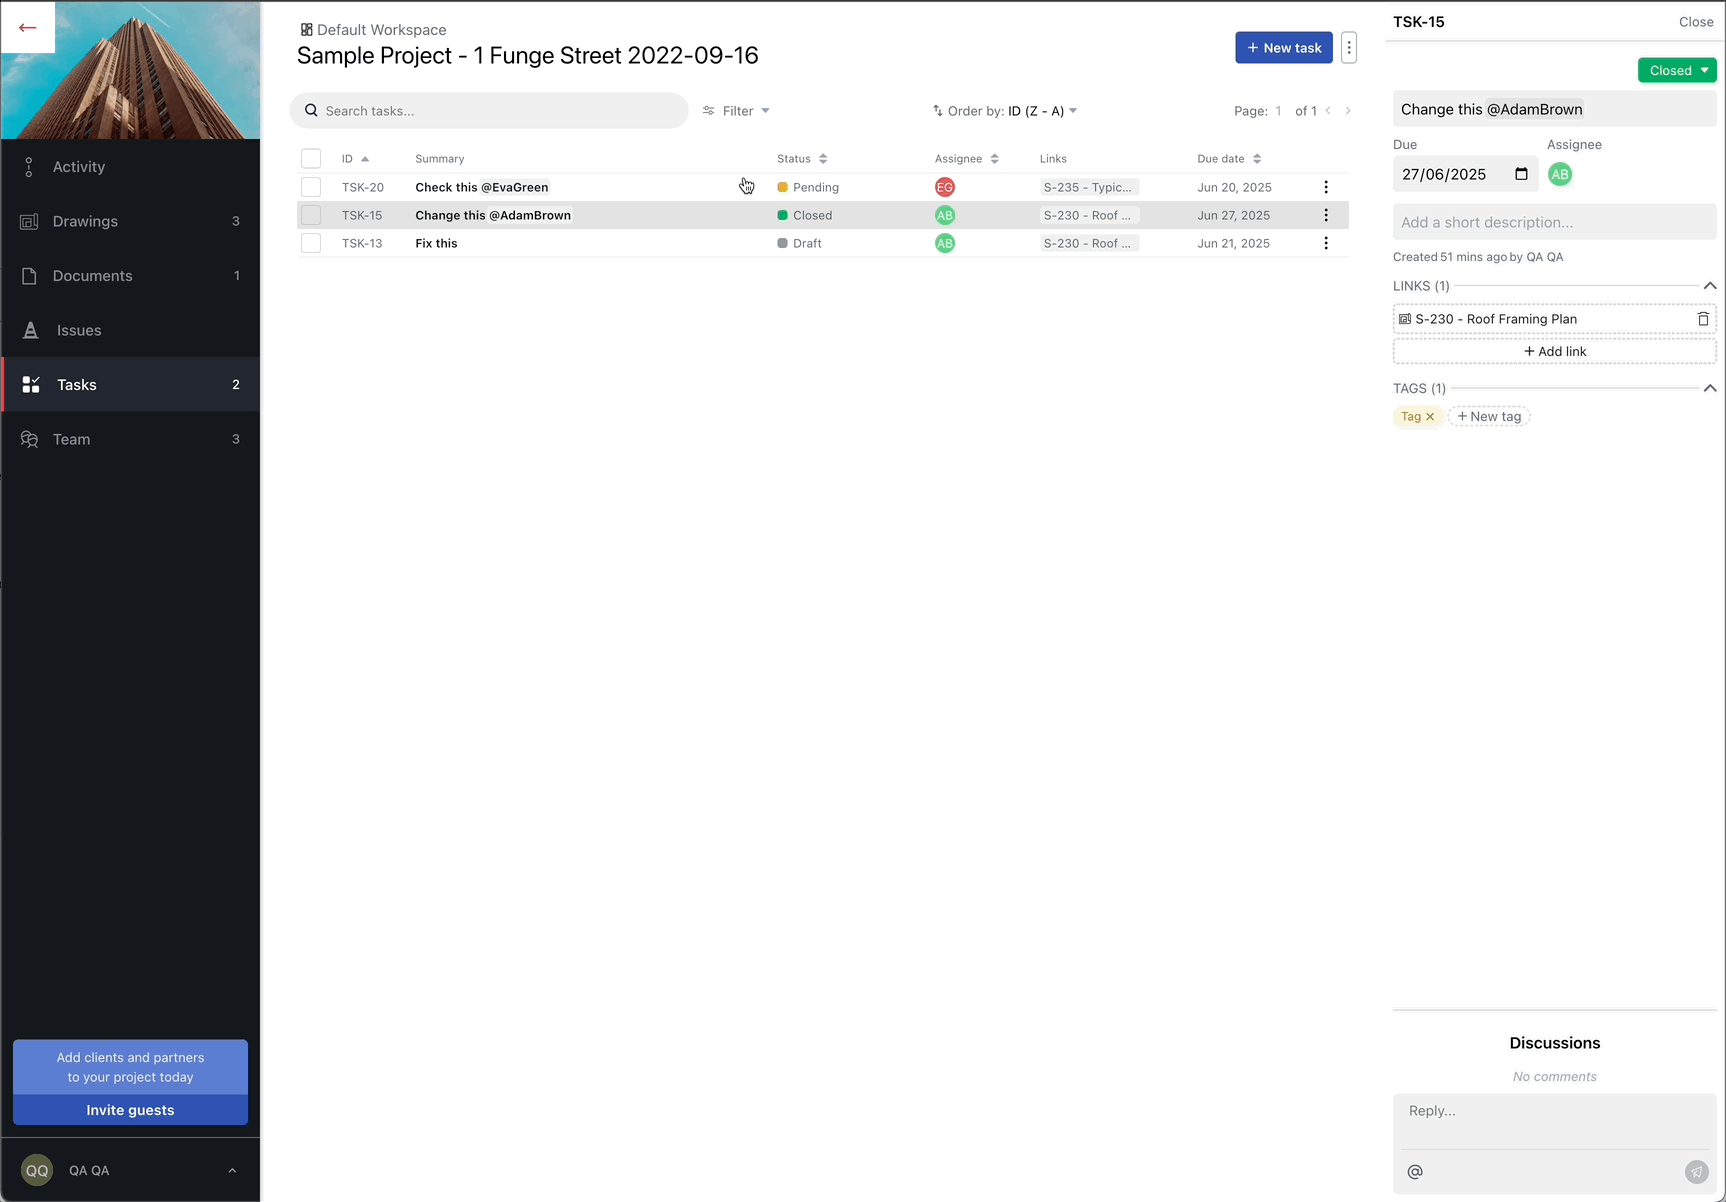
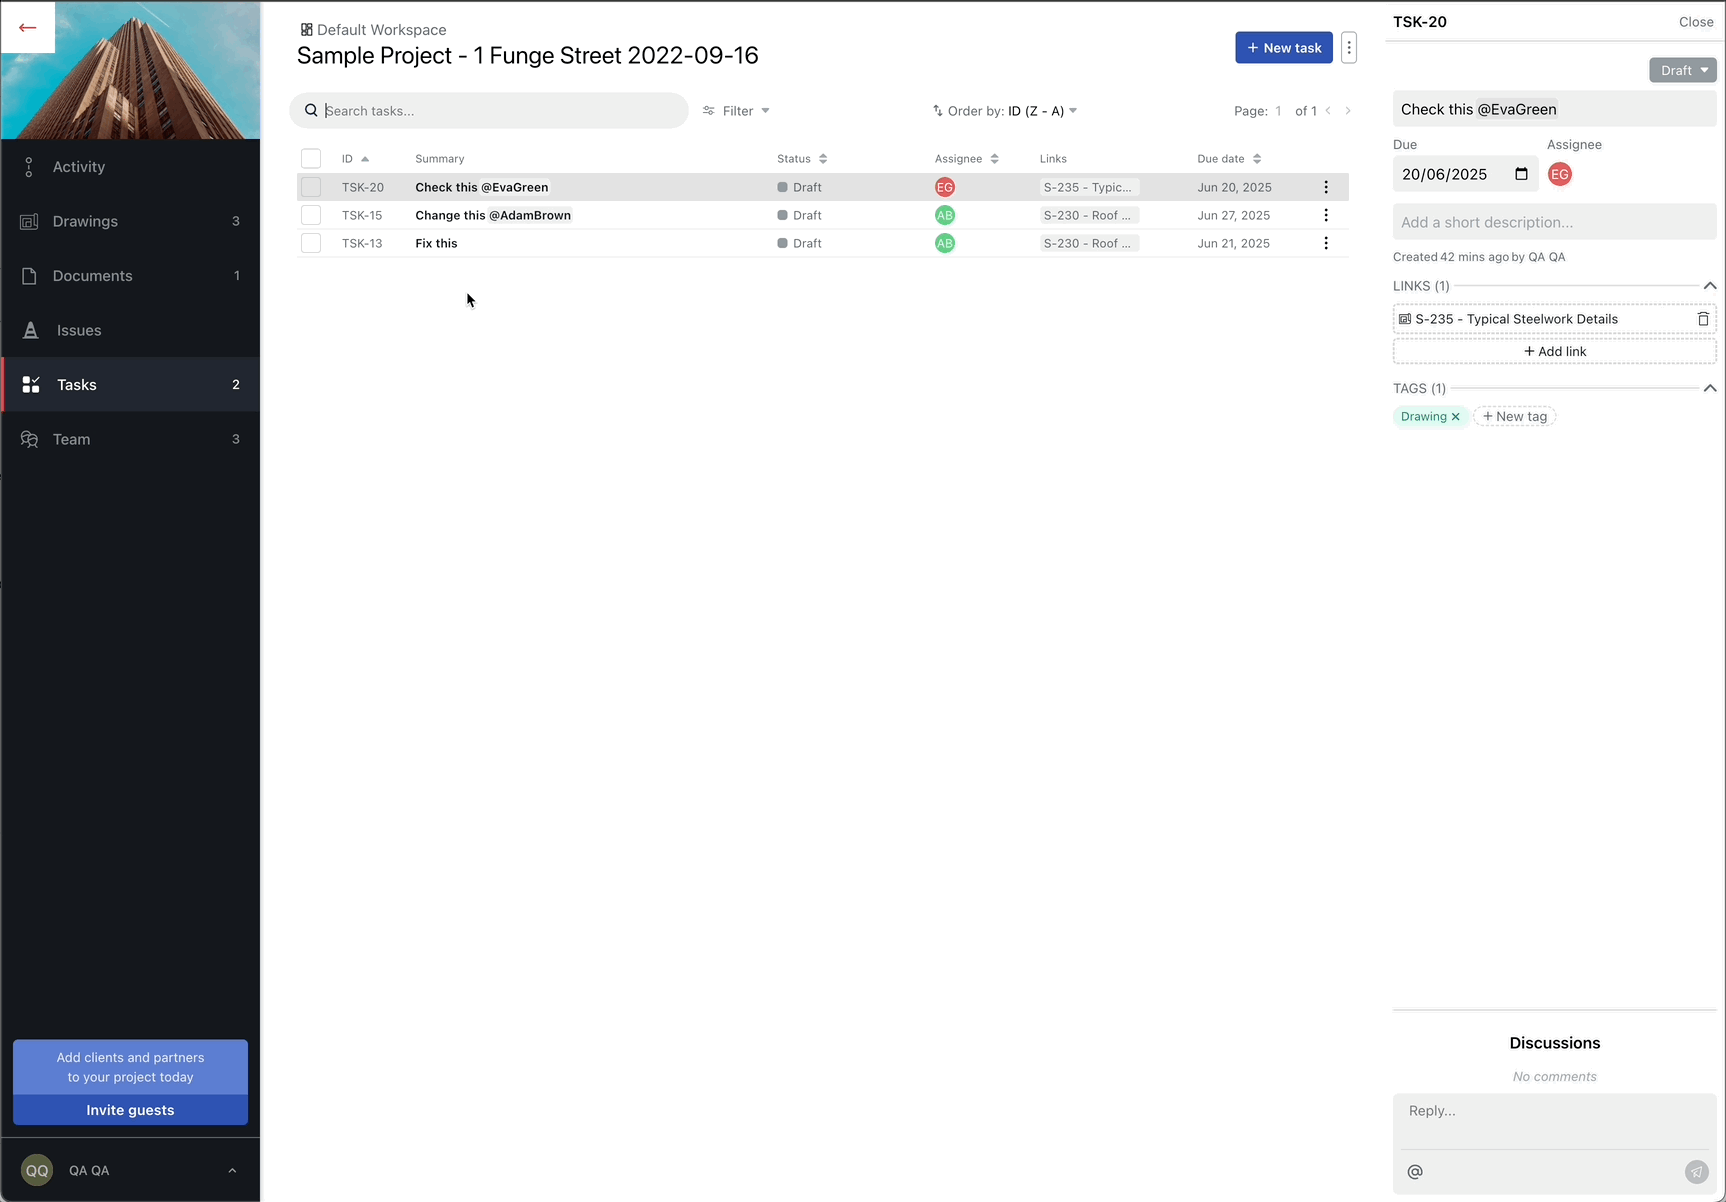
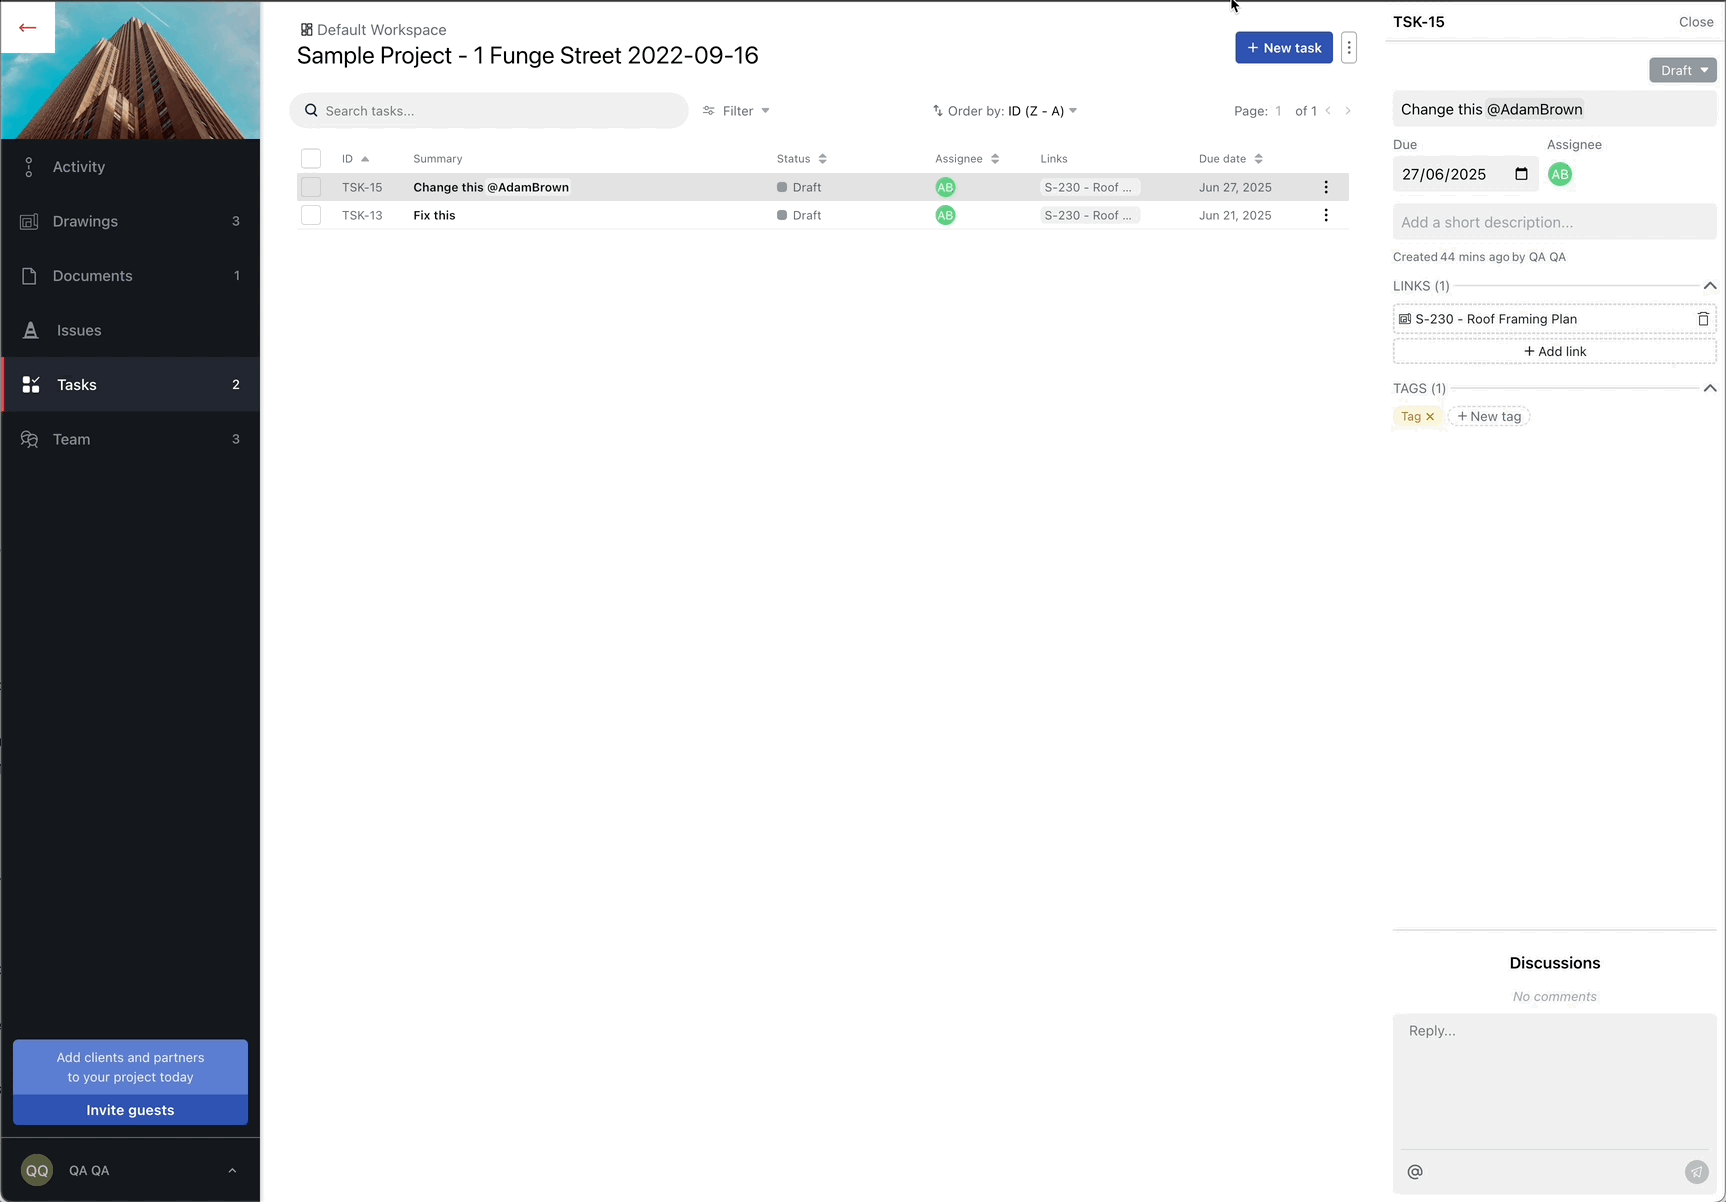
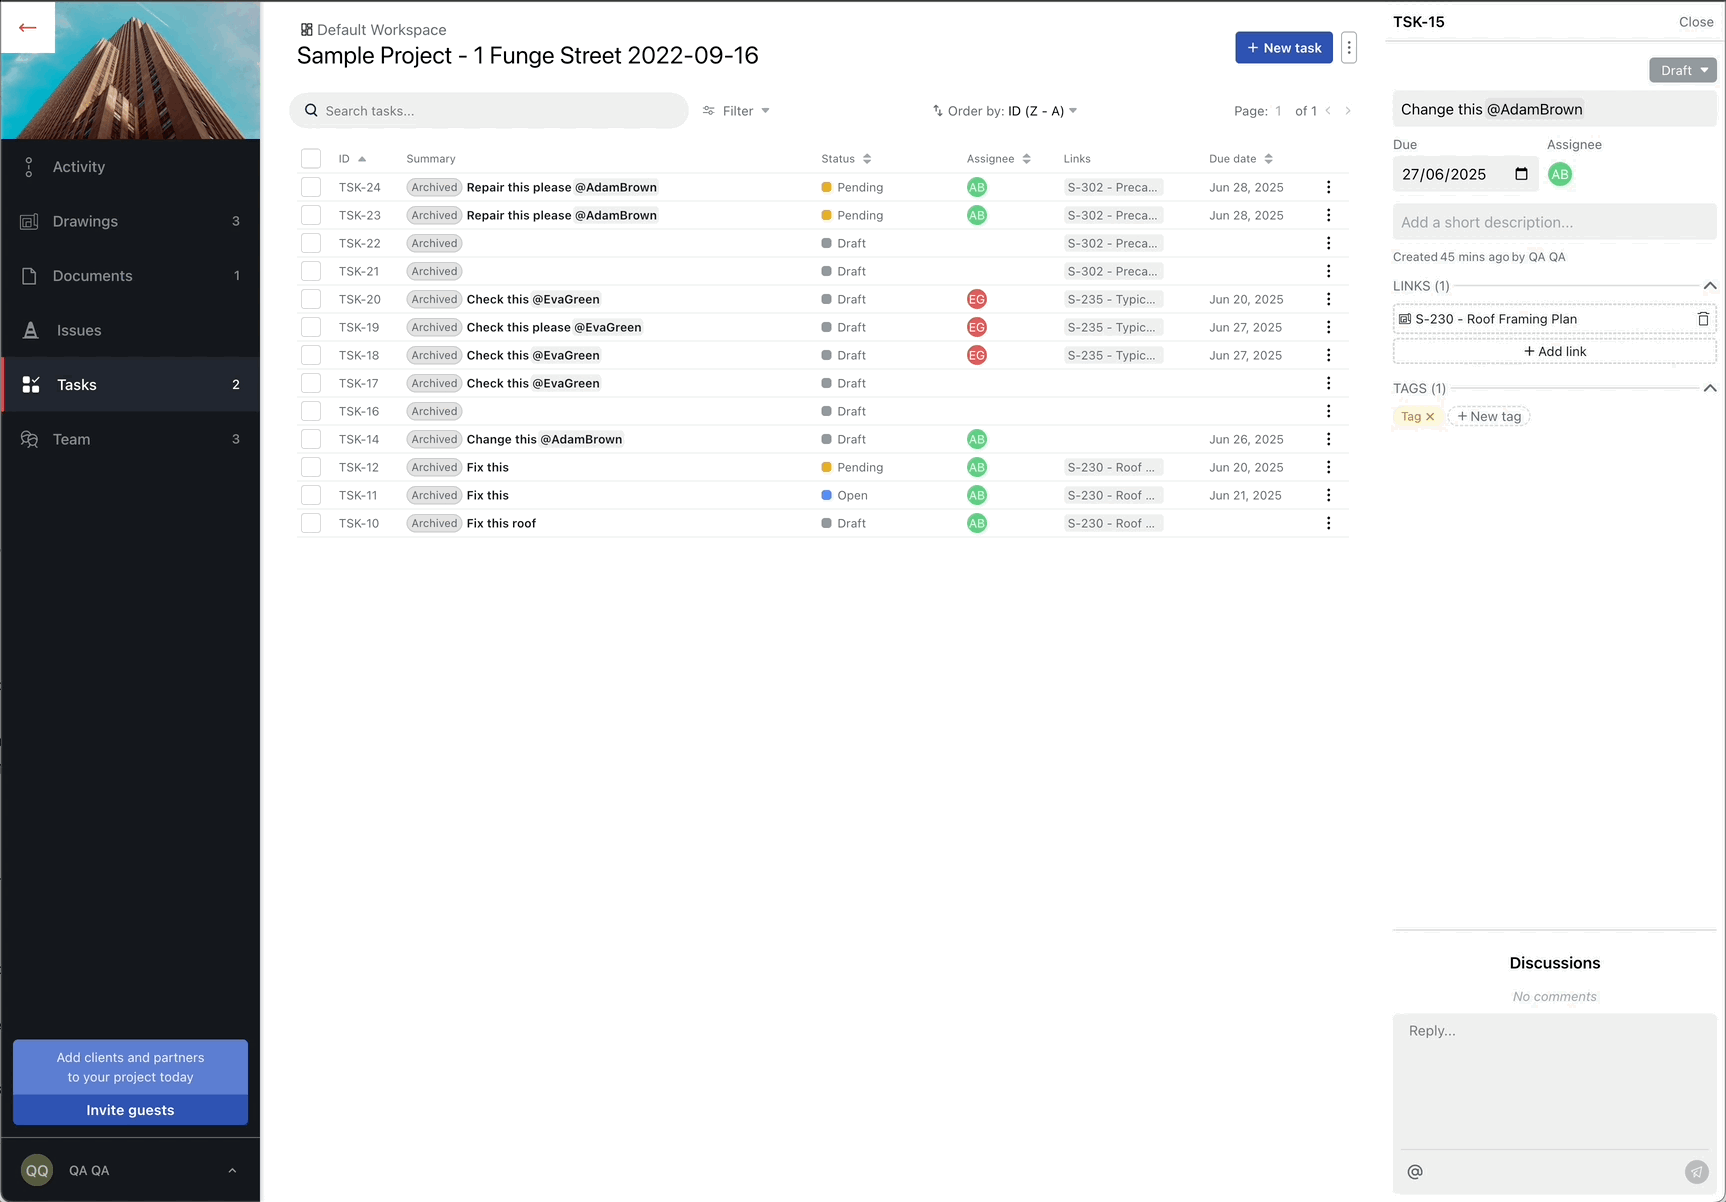
- Select + New task or + New Issue button on the top-right corner of the page. This will instantly create a new task or issue, and the details panel will slide out from the right-hand side.
- Fill in the details:
-
Status: Choose from Draft, Open, Pending, In Review, On Hold, Closed.
-
Summary: Enter a short summary for the task or issue.
-
Due date: Select a due date, if applicable.
-
Assignees: Assign the task or issue to one or more users. Assigned users will receive an email notification.
-
Description: Add a more detailed explanation.
-
Linked Drawings or Documents: Click + Add link and select one or more drawings or documents from the list to associate with the task or issue. Once you linked, you can click on the drawing or document to open it directly.
-
Tags: Add tags to make filtering and searching easier. New tags are automatically saved to the tag library for future use.
-
Discussion: Use the discussion area at the bottom of the panel to collaborate. Mention any workspace members using @username. Mentioned users will receive an email notification.
- All changes are saved automatically—no manual saving required.
Tip: All fields are optional! You don't need to fill out every field to create an issue or task. This makes it quicker and easier to log tasks or issues on the go.
Adding a task from the task list
While viewing a Drawing or Document
- Open a Drawing or Document.
- In the left hand side menu bar, open the Tasks or Issues panel.
- With the tasks or issues panel open, select +New task or +New issue.
- Fill in the details as per the section here.
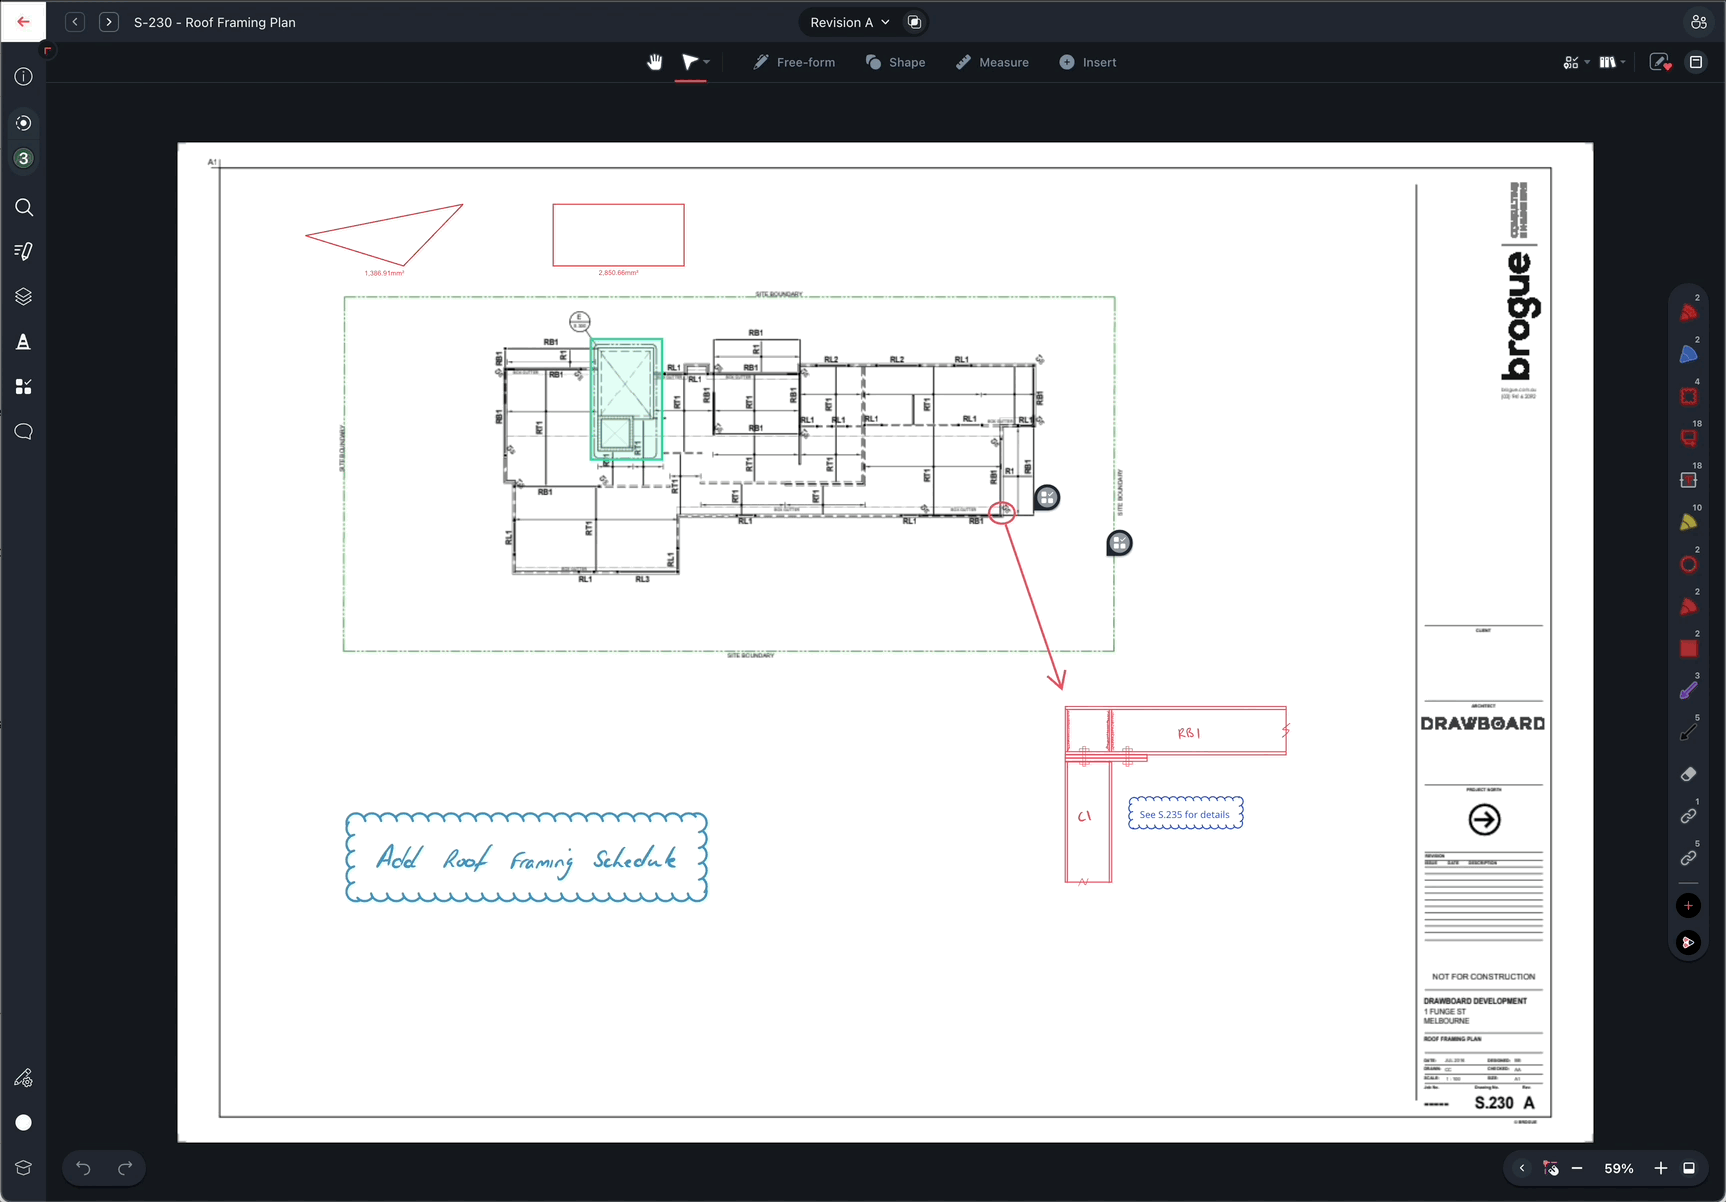
Adding a task from a drawing
From pinning a Task or Issue
- Open a Drawing or Document.
- On the right side of the markup toolbar, next to the Markup Library tool, you'll see the Pin tool, which lets you pin a Comment, Issue or Task.
- To use the currently selected pin type, click the Pin tool once. To change the pin type, click the Pin tool a second time to open the pin selection menu
- Choose Issue or Task pin
- Click anywhere on the drawing or document where you'd like to pin the item.
- A pop-up panel will appear, allowing you to enter the following detail: A short summary, tags, assignee, due date, the current status.
- Once you've entered the necessary information, click the blue save button in the bottom-right corner of the panel.
- To view details of the pinned item in the Tasks or Issues panel, click on a task or issue and then click the arrow icon next to the status in the pop-up panel.
Adding a task from pinning
Creating a Task or Issue Pin on iOS
Pinning tasks or issues on iOS works a little differently than on other platforms. Here’s how to do it:
- Open a Drawing or Document.
- Tap the toolbar and add both the Task Pin and Issue Pin tools to your toolbar.
- Once added to the toolbar, click anywhere on the drawing or document where you'd like to pin the item.
- A pop-up panel will appear, allowing you to enter the following detail: A short summary, tags, assignee, due date, the current status.
- Once you've entered the necessary information, tap the arrow button in the bottom-right corner of the panel to save your pinned task or issue.
- To see more details later, tap the pin, then tap the arrow icon next to its title in the pop-up panel. This will open the full Task or Issue panel for editing or review.
Note: Currently, it's not possible to pin an existing Task or Issue. We're actively working on adding this feature in a future update.

Creating a Task pin from the toolbar on iOS
Pinning an existing Task or Issue
If you’ve already created a task or issue, you can pin it to a specific location in a drawing or document.
To pin an existing task or issue:
- Open a Drawing or Document.
- In the left hand side menu bar, open the Tasks or Issues panel.
- Find the task or issue you want to pin, then click the location icon () next to the status.
- Click anywhere on the drawing or document where you'd like to pin the item.

Pinning an existing task to a drawing
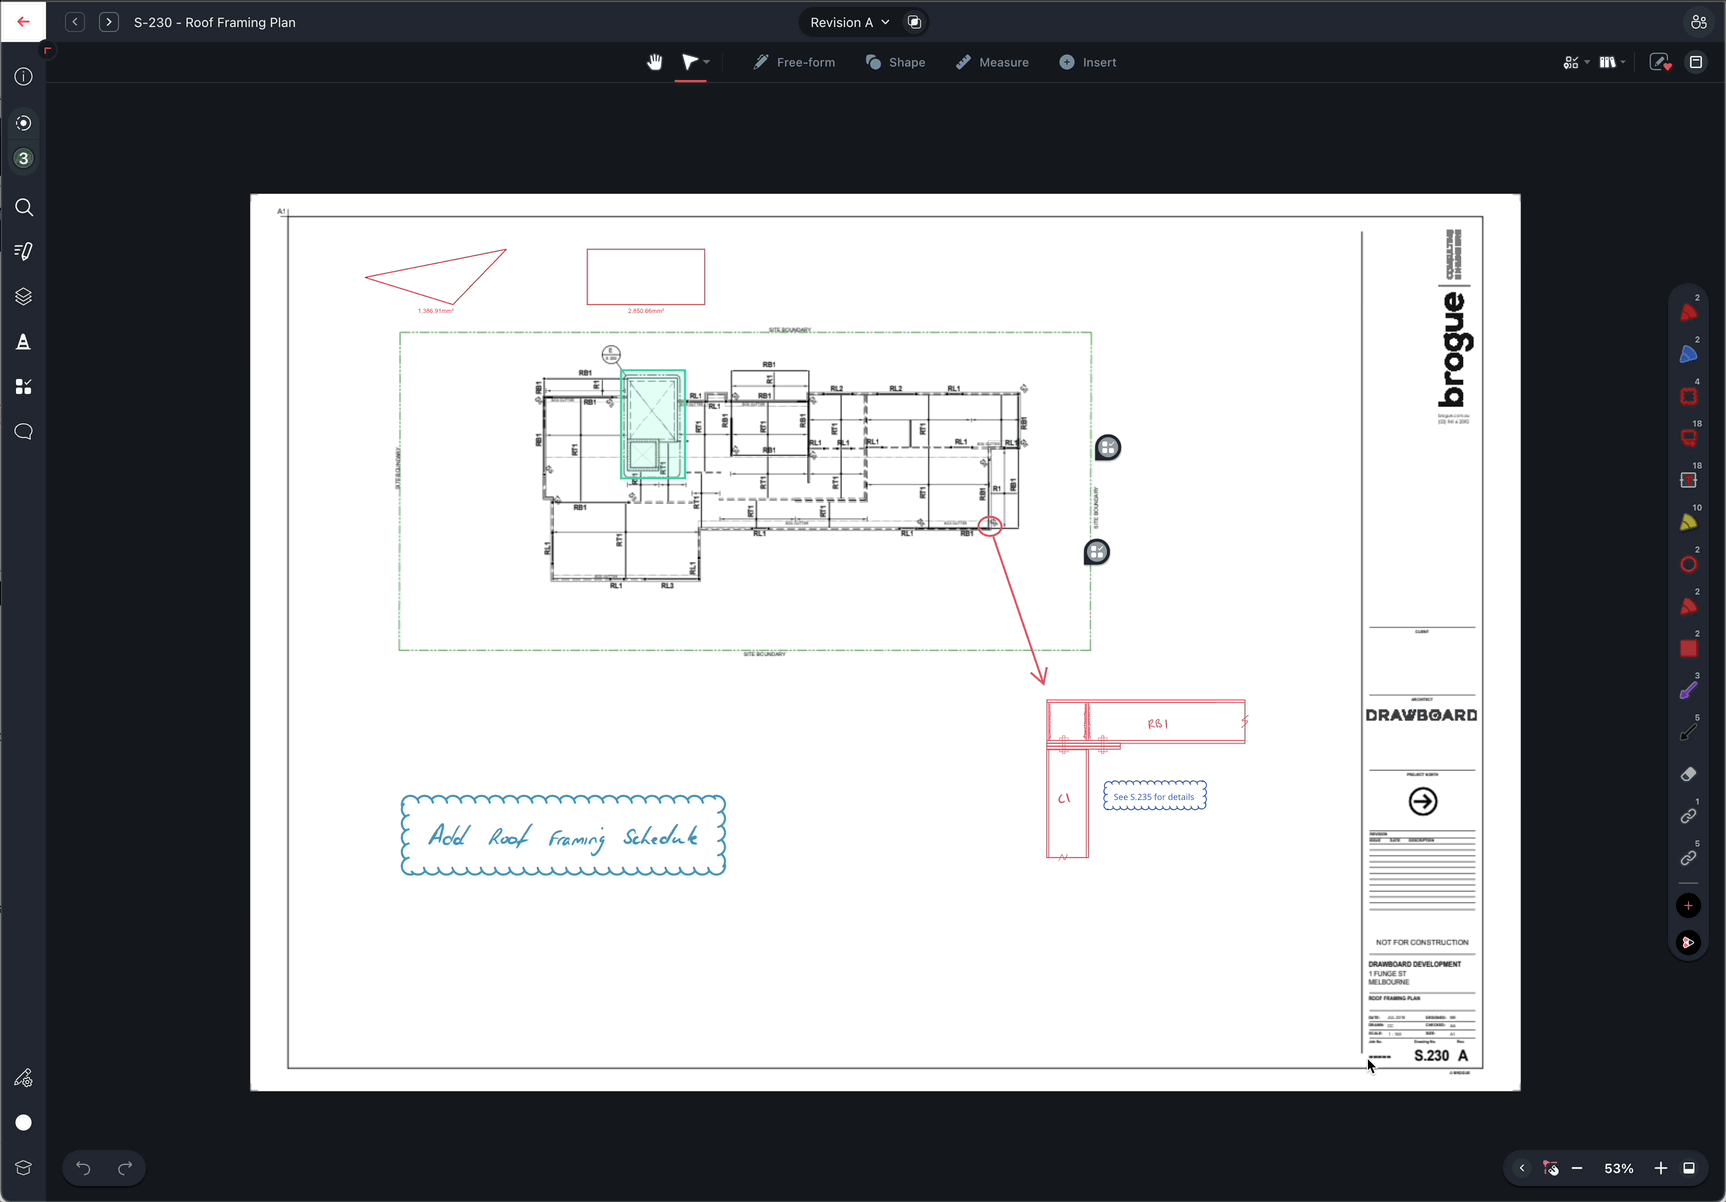
Moving a pinned Task or Issue
To move a pinned task or issue:
- Open a Drawing or Document.
- Click and drag the pin you want to move to the new location and the location will be updated accordingly.
Note: Any team member with Collaborator or higher permissions can move and edit Tasks and Issues
Moving a pinned task
Changing the pins shown on the canvas
By default, pins for done items (e.g. when Tasks are 'Complete' or Issues are 'Accepted,' 'Rejected,' or 'Closed') are automatically hidden on the canvas.
To change which pins are shown on the canvas, and show done items:
- Open a Drawing or Document.
- Click the < button in the lower right of the canvas to expand the Utility bar
- Click the Show/hide pins icon
- Choose which pin types to display, and optionally choose to show done items
Note that this filter resets when you leave the canvas.
Changing the pins shown on the canvas
Adding Attachments (Photos) to Your Tasks or Issues
You can now attach photos to your tasks or issues and view them by hovering over the pin. You can add photos either from the Tasks List or directly from the Drawing/Documents.
From the Tasks/Issues List
- Select the task or issue you want to add the photo to.
- Choose one of the following options to add a photo:
-
Upload from Device – Select a photo stored on your computer or device.
-
Browser Gallery – Use a photo from the project’s gallery (a central place for all uploaded photos in the project). Learn more about the gallery here.
-
Paste from Clipboard – Copy an image and paste it directly.
Adding a photo to a task via the Tasks List
From a Drawing
- Open the tasks/issues menu.
- Select the task/issue you want to attach photos to.
- Use one of the three options above to add the photo.
Note: You can always unlink a photo from a task by clicking the X button in the top-right corner of the image.
Once inserted, you can view the attached photos by hovering over the pin on the task or issue.

Hovering the task pin to show the photos
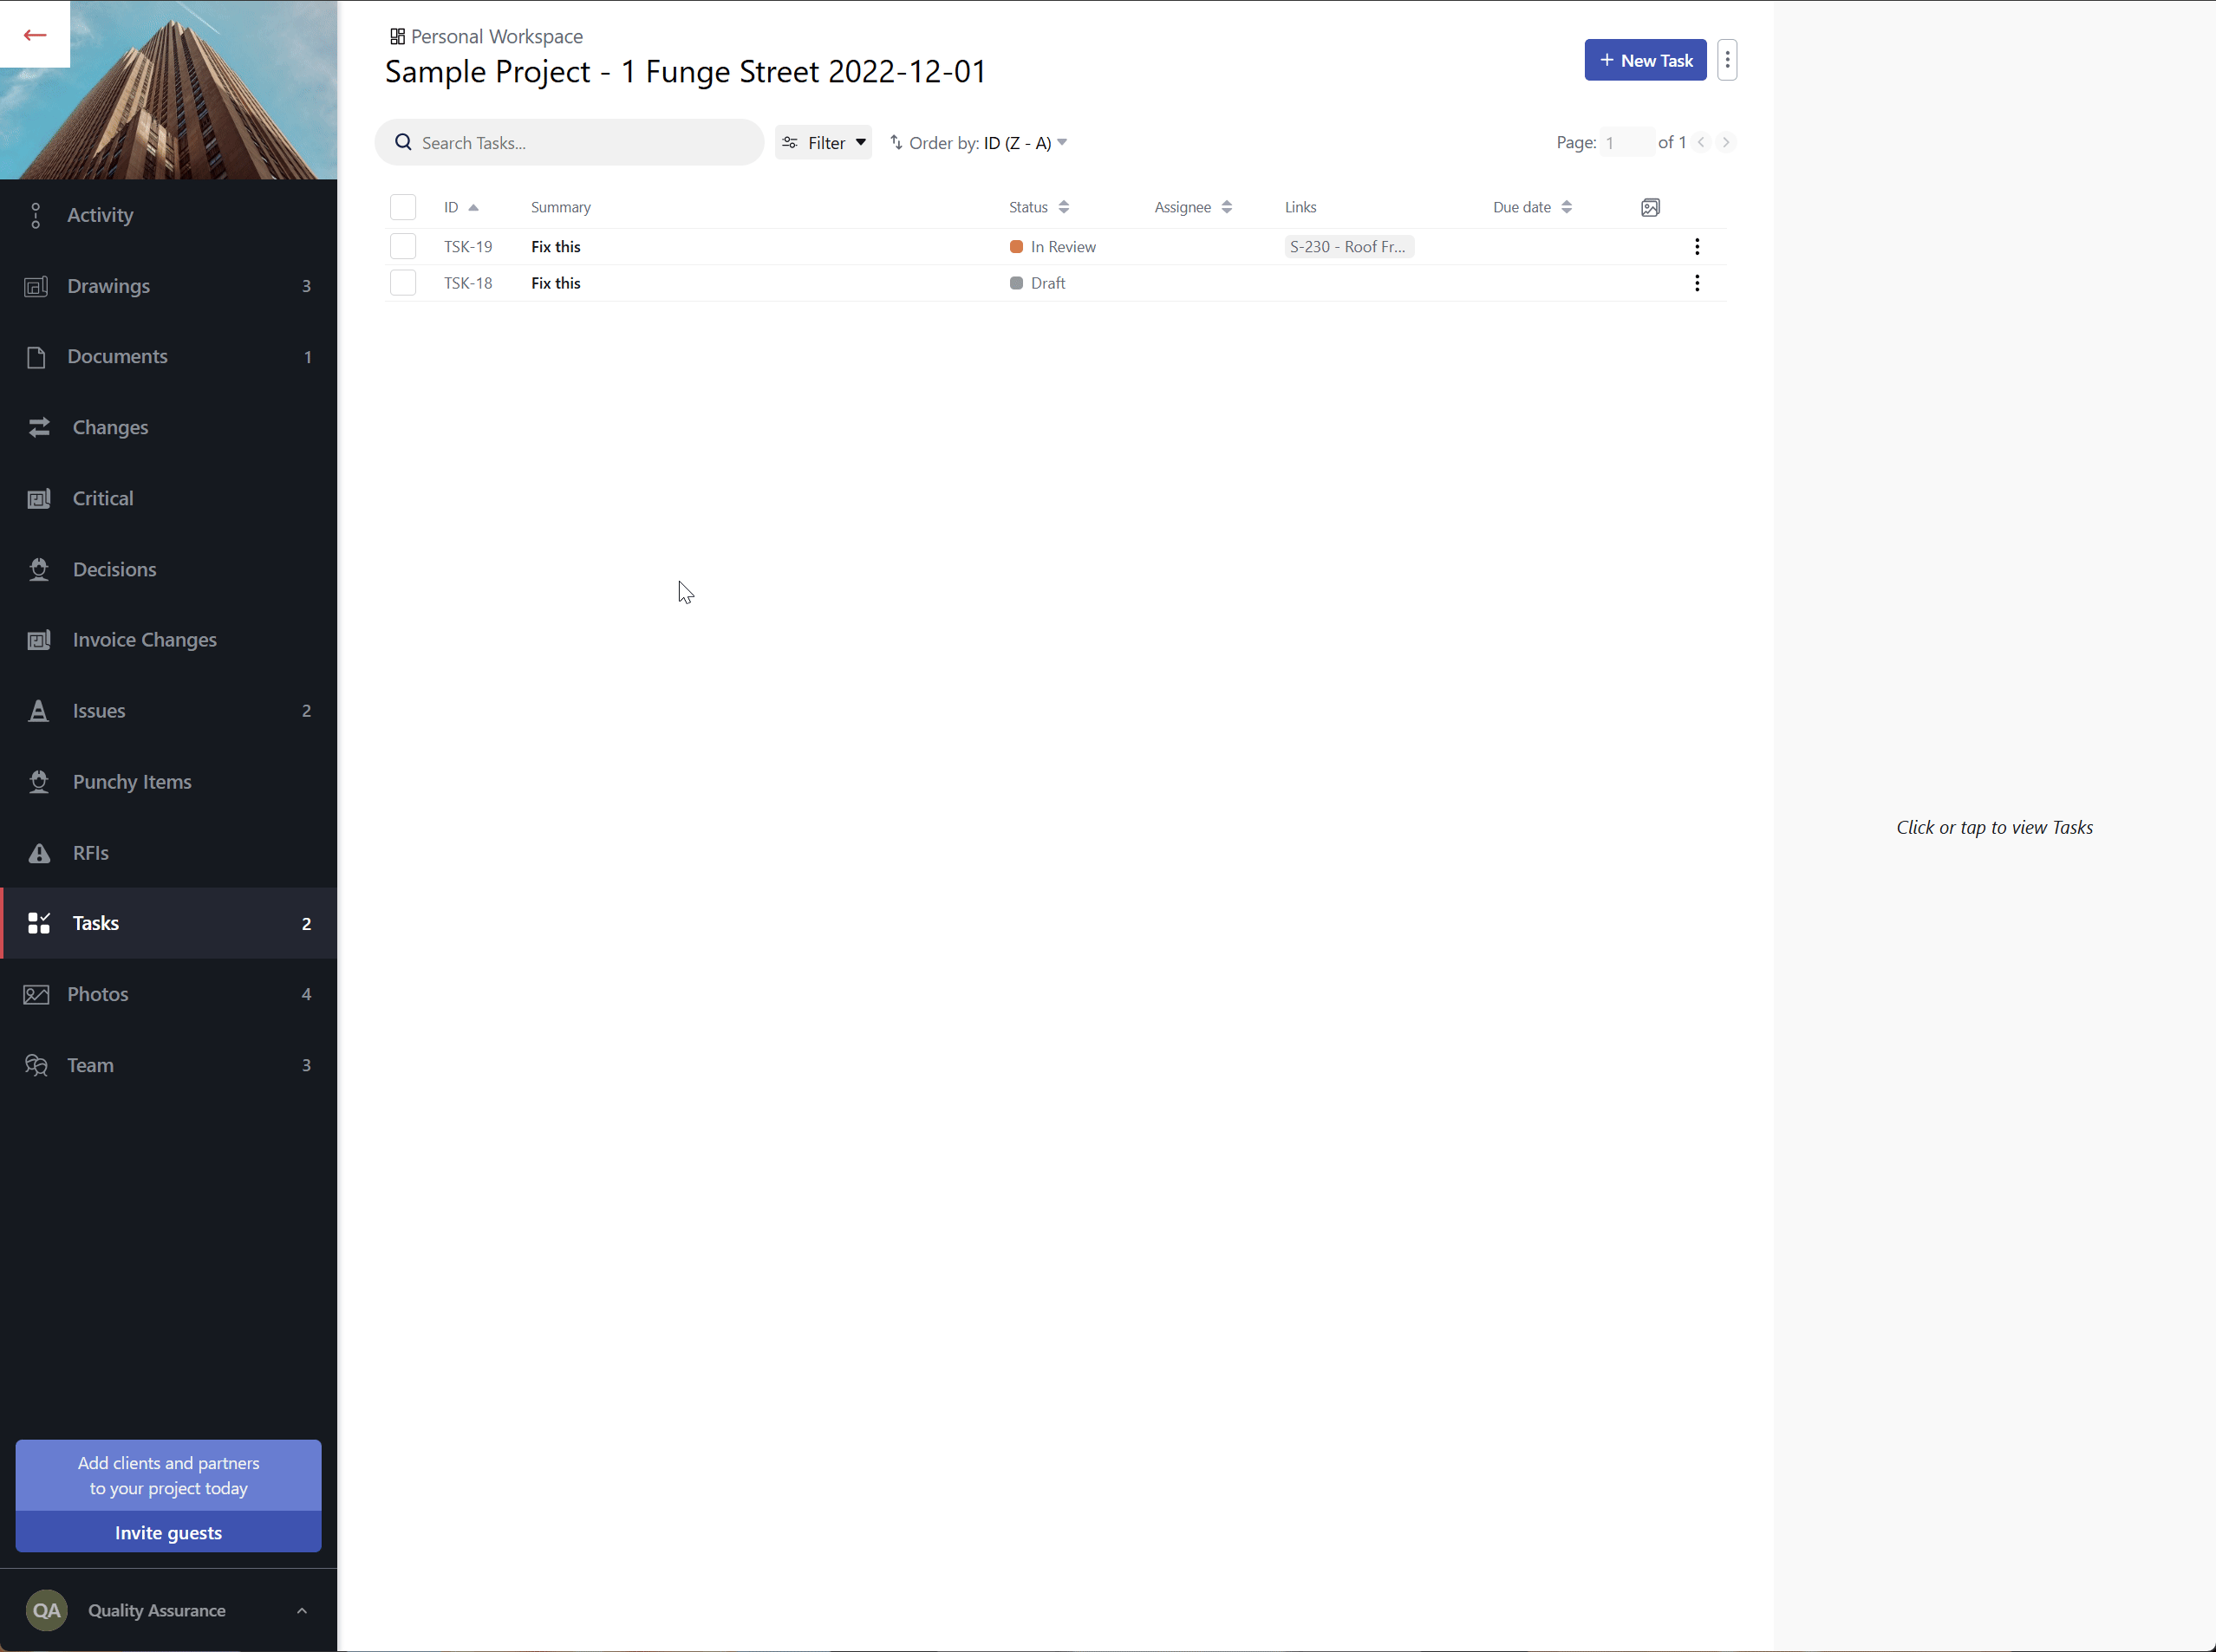
Managing Tasks or Issues List
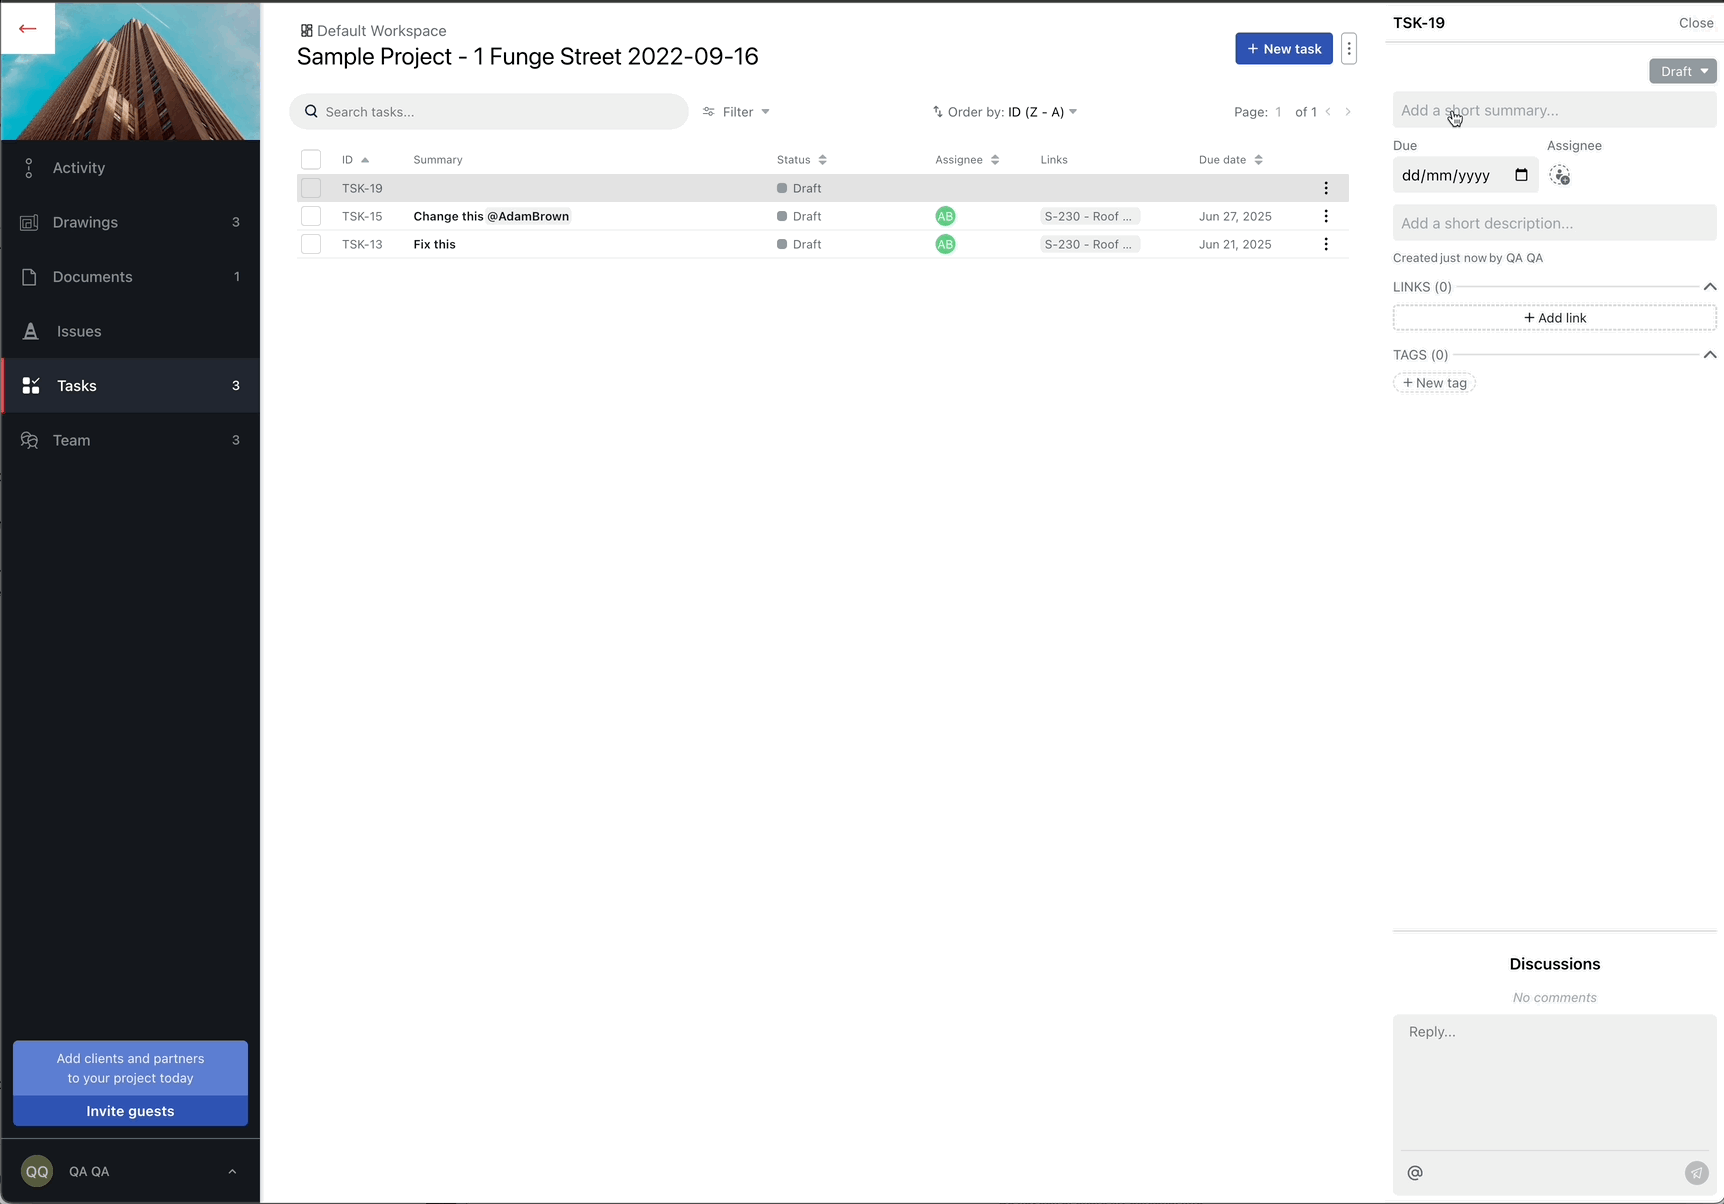
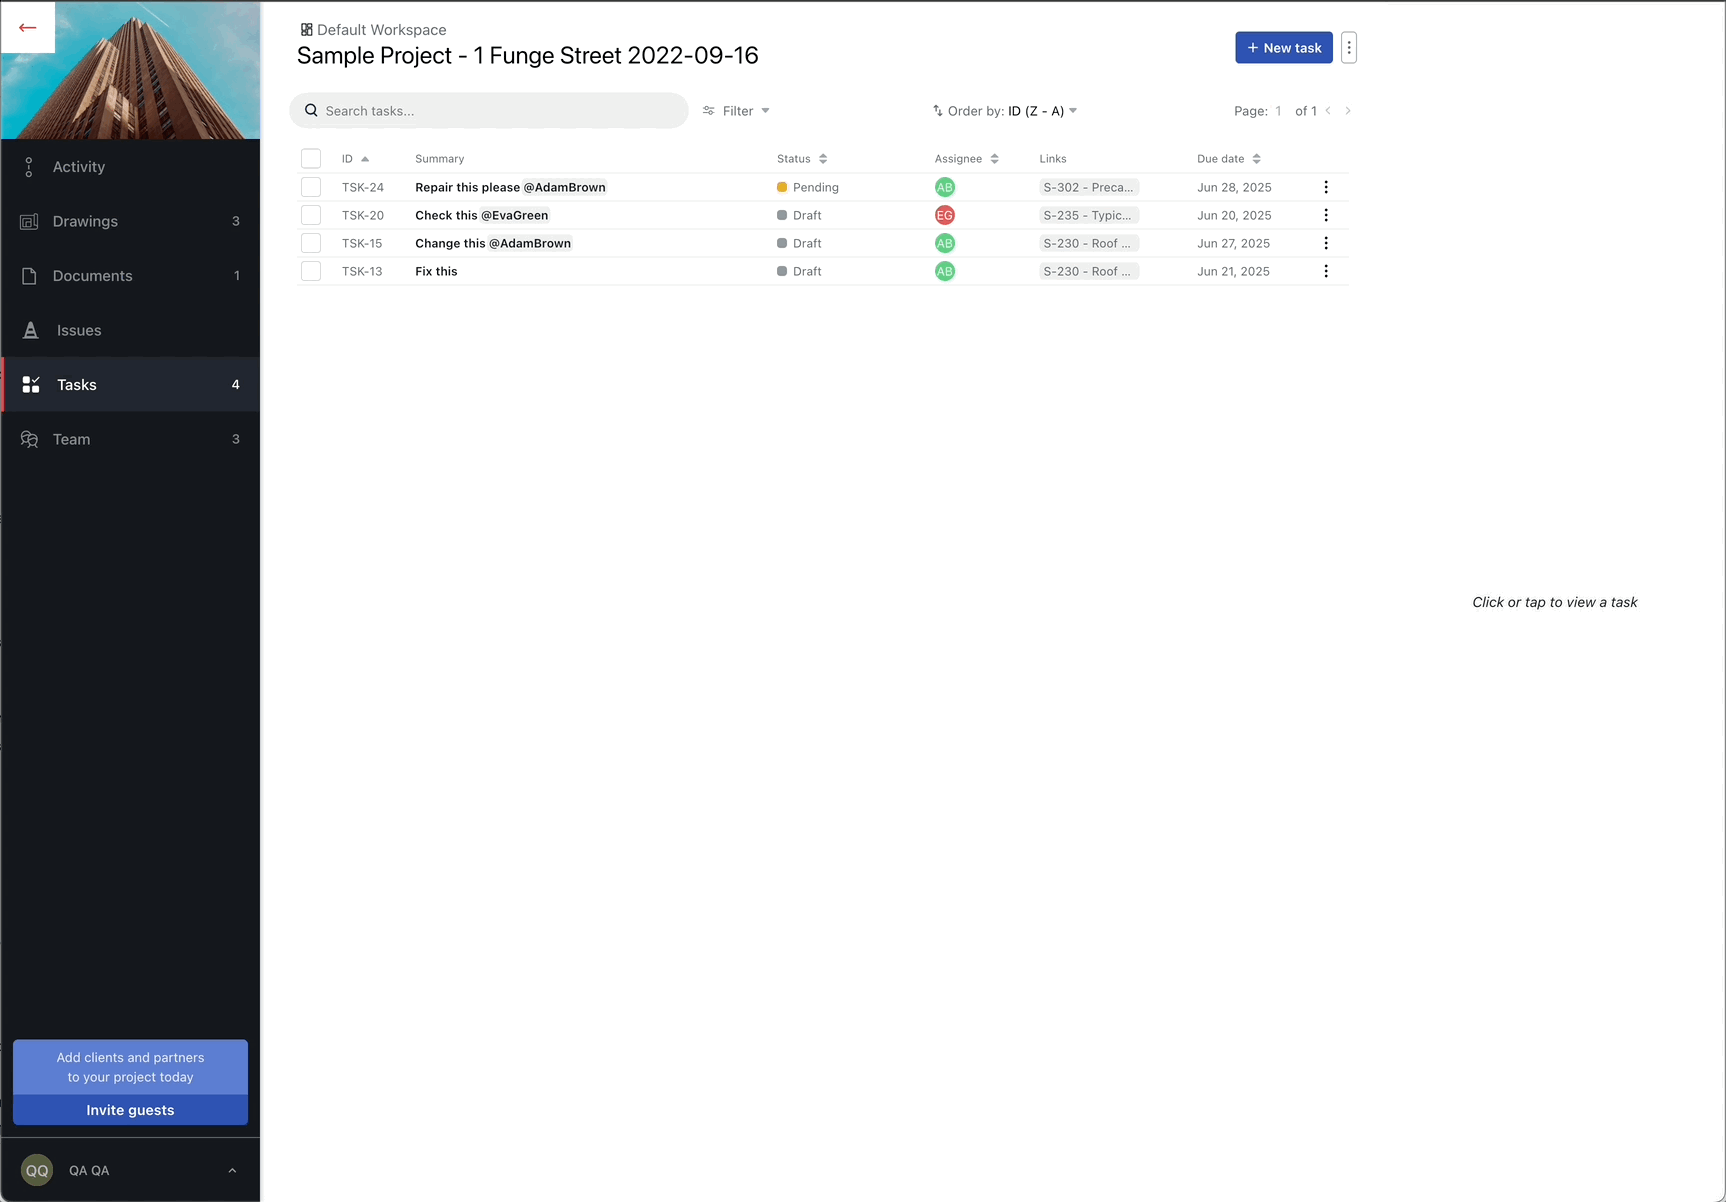
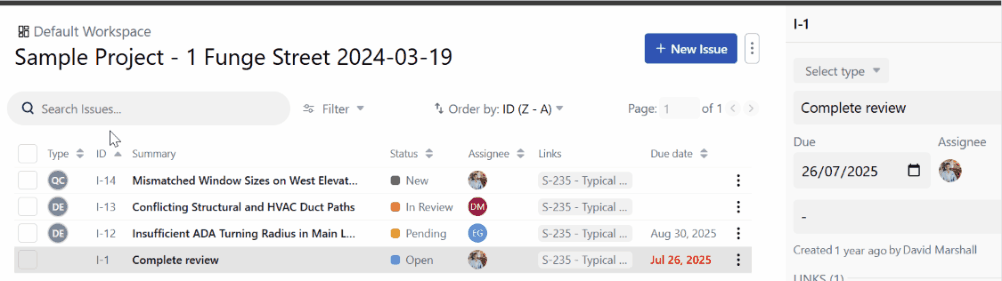
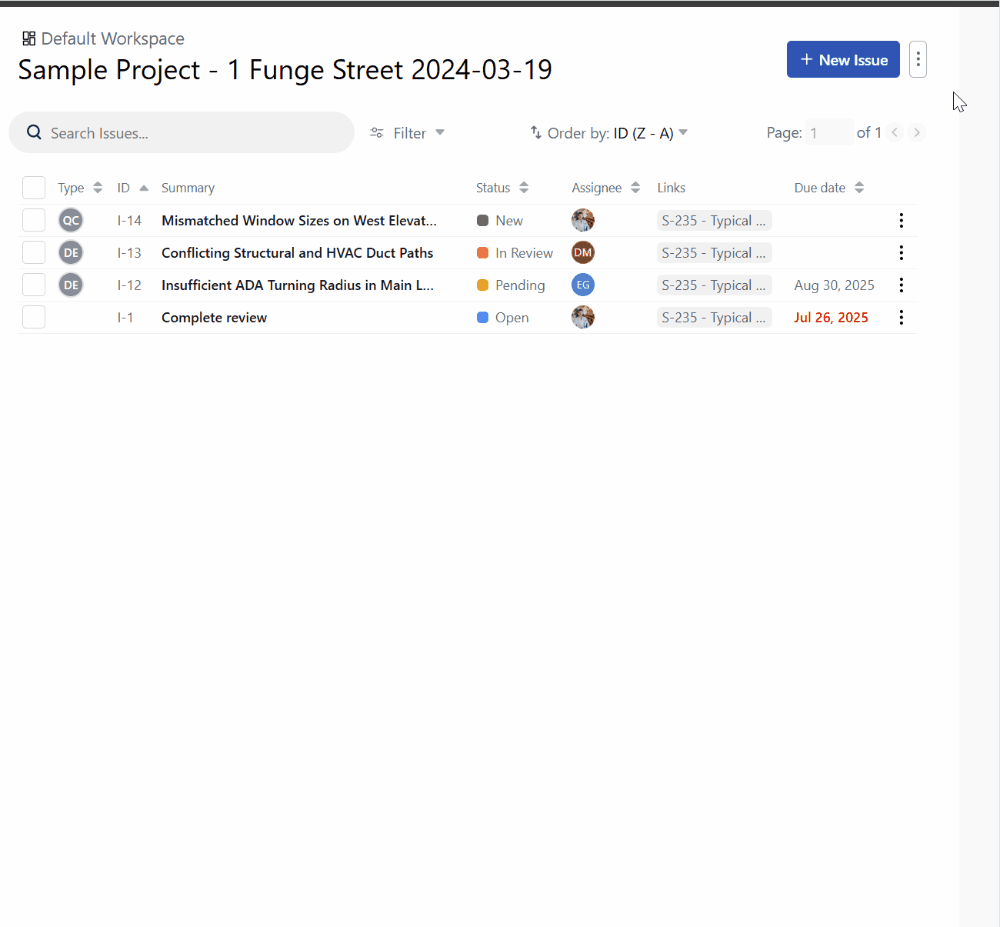
The project Tasks or Issues List conveniently tracks every Task or Issue raised in the project, and presents a snapshot of the details, status, assignee and due date for each item.
The new Tasks List
When coupled with quick filters and search capabilities, it has never been easier to check on the progress of design reviews and ensure designs are delivered to the highest standard.
Filtering Tasks or Issues
To filter your Tasks or Issues register to display just what you need:
- Select the Filter issues option at the top of the Issues register to view the available quick filter options.
- Check the option that best matches what you are looking for. The options are:
-
Created by me - any tasks or issue originally created by you.
-
Assigned to me - any tasks or issues currently assigned to you.
-
Due soon - any tasks or issues that aren't done and that are approaching their due date.
-
Overdue - all tasks or issues that aren't done and that are past their due date.
-
Tags - filter based on one or more tags.
-
Status - filter by status
-
Unstarted: Draft.
-
Started: Open, Pending, In Review.
-
Done: Closed, Approved, Rejected.
Filtering the tasks list by status
Searching for a specific Task or Issue
While quick filters are helpful, the search bar offers more flexibility when you need to find specific tasks or issues by keyword.
To search by title:
- Select the search box at the top of the Tasks or Issues list.
- Type in any part of the task or issue title you want to find.
- Click enter to find your tasks or issues.
Searching for a task by the task title
Sorting Tasks or Issues
In addition to search and filter options, you can also sort the list of tasks or issues to better organise your view.
Available sorting options:
-
ID (A-Z) - Sorts by task or issue ID in ascending order.
-
ID (Z-A) - Sorts by task or issue ID in descending order.
-
Status (A-Z) - Sorts status in alphabetical order.
-
Status (Z-A) - Sorts status in reverse alphabetical order.
-
Due Date (Past-Future) - Shows the earliest due dates first.
-
Due Date (Future-Past) - Shows the most distant due dates first.
-
Assignee (A-Z) - Sorts by assignee name in alphabetical order.
-
Assignee (Z-A) - Sorts by assignee name in reverse alphabetical order.
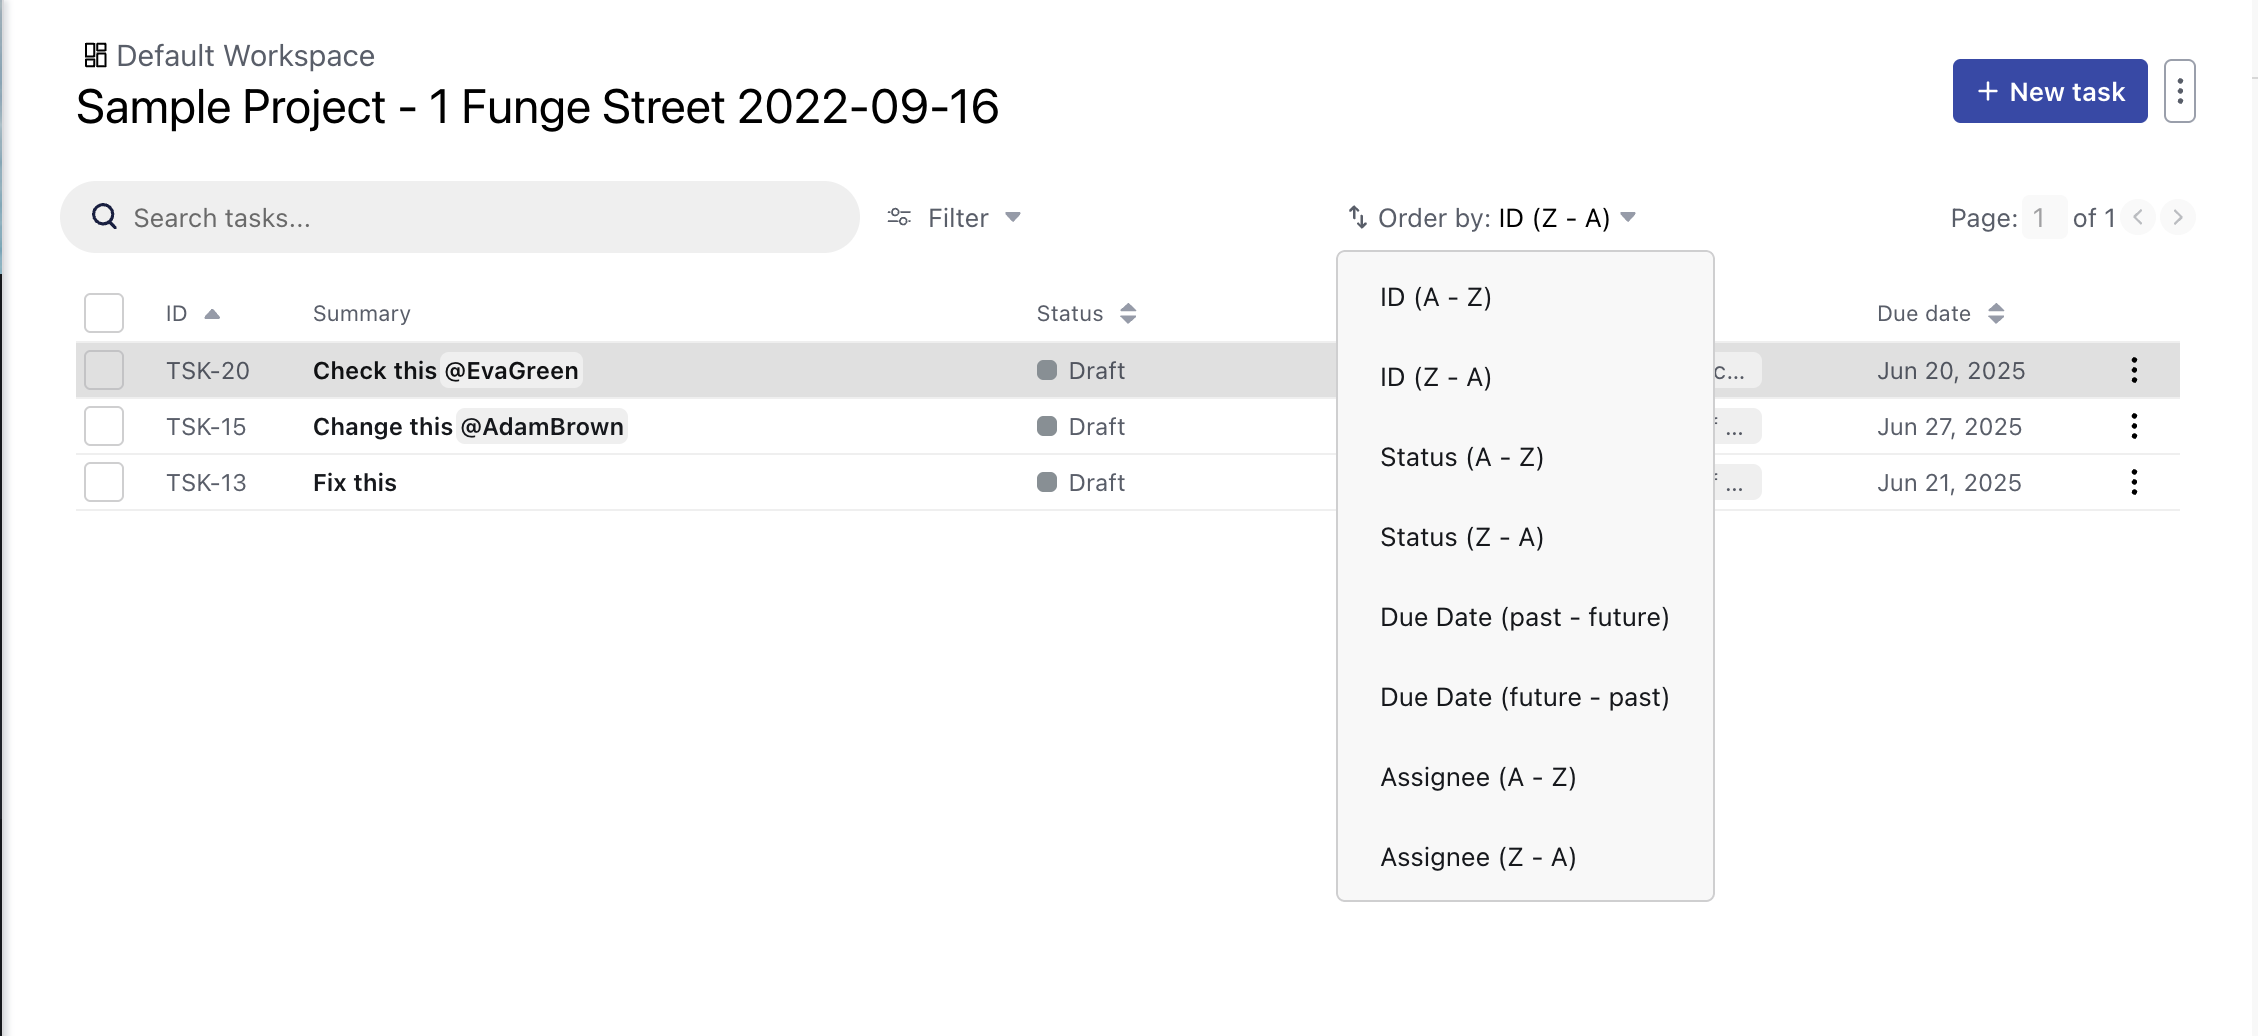
Sorting options in the Tasks list
Archiving Tasks or Issues
Archiving tasks or issues helps keep your workspace focused by removing items that are completed, no longer relevant, or part of older review cycles. This allows you and your team to concentrate on what still needs to be resolved.
When a task or issue is archived:
- It is removed from the task or issue list for all project members.
- It no longer appears in task or issue counts.
- Its status does not need to be closed. You can archive tasks or issues in any state, including Open or Pending, such as those created by mistake.
- Project members can still add comments without needing to unarchive.
How to archive Tasks or Issues
- Within a project, navigate to the Tasks or Issues tab. By default, this displays only active (unarchived) tasks or issues.
- Click the checkbox next to each task or issue you want to archive.
- Click the three-dot menu (⋯) next to the ID column header, then select Archive.
- If asked whether you wish to continue, click Archive Issues or Archive Tasks.
Archiving a few tasks
Accessing archived Tasks or Issues
When viewing the list, you can switch between viewing active (unarchived) and archived issues. Archived issues or tasks are not "locked" in any way, and can be opened and used normally, e.g. issue or tasks status and due date can be changed, comments can be added, etc.
In the Web app, click the three-dot menu (⋯) next to the + New issue or + New Task button, then select Show Archived. Click Show Unarchived to switch back to viewing active tasks or issues.
Accessing archived tasks
How to unarchive Tasks or Issues
- Navigate to the Tasks or Issues tab, and use Show archived to display all archived tasks or issues.
- Click the checkbox next to each task or issue you want to archive.
- Click the three-dot menu (⋯) next to the ID column header, then select Unarchive.
- If asked whether you wish to continue, click Unarchive Issues or Unarchive Tasks.
Unarchiving a few tasks
How to permanently delete a Task or Issue
Archiving a task or issue does not delete it. Archived items are simply removed from the active list but can still be viewed using the Show Archived filter.
To permanently delete a task or issue:
- Navigate to the Tasks or Issues tab, and use Show archived to display all archived tasks or issues.
- Click the checkbox next to each task or issue you want to archive.
- Click the three-dot menu (⋯) next to the ID column header, then select Delete.
- If asked whether you wish to continue, click Delete Issues or Delete Tasks.
Note: Only Project admins have permission to permanently delete tasks or issues.
Permanently deleting a task
Exporting Task Lists
If you need to report on project progress or share data outside of Drawboard Projects, you can generate a CSV exports of some or all tasks or issues in your projects.
Exporting selected items from a Task List
To export a selection of items from a Task List:
- Navigate to the Task List you wish to export from
- Select the items you wish to export by clicking on the checkbox on the left of each row
- Click the More (...) menu above the Task List and choose Export
Exporting all items from a Task List
When you are ready to export your task list, click the More (...) button next to the +New Issue button above the list to open the Download Issues dialogue box.
This dialogue allows you to filter the tasks you wish to include in the CSV export. You can narrow down the list by the task's status, type, and assigned team member. The dialogue box also provides options to filter by Linked documents and drawings, or by custom tags. You can also filter by the time of the last update, creation date, or include only overdue items or items that are due soon. The number of issues to be included in the export will update as you apply your filters.
Once you have made your selections, click the Download button to save your customized CSV file.
Customizing the Task Lists available in your account
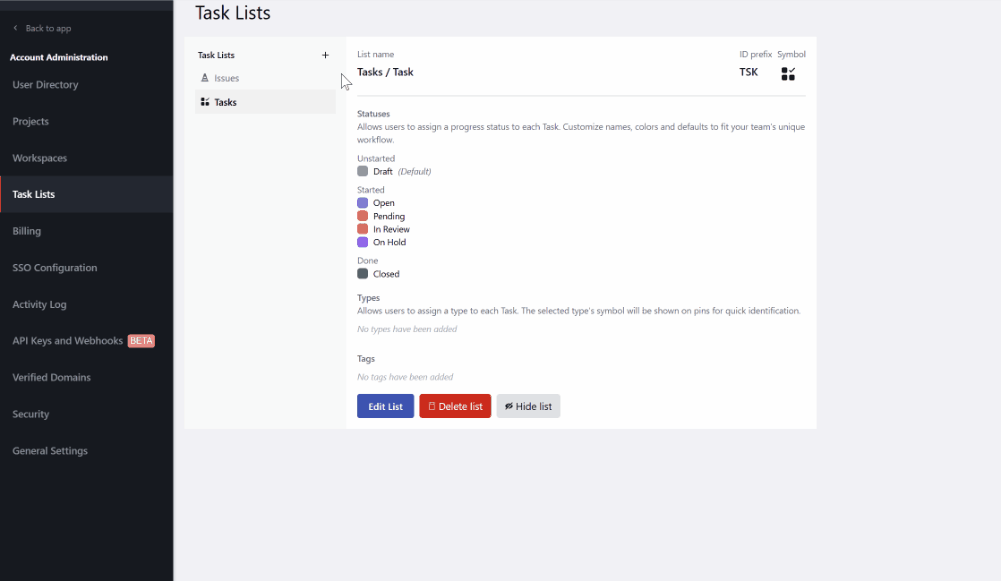
If you have a Growth or Enterprise account plan, your Organization Admins can completely customize the Task Lists available on all projects. They can do this by accessing the Account Admin portal and navigating to the Task Lists tab.
Each account starts out with two Task Lists named Issues and Tasks as shown below.
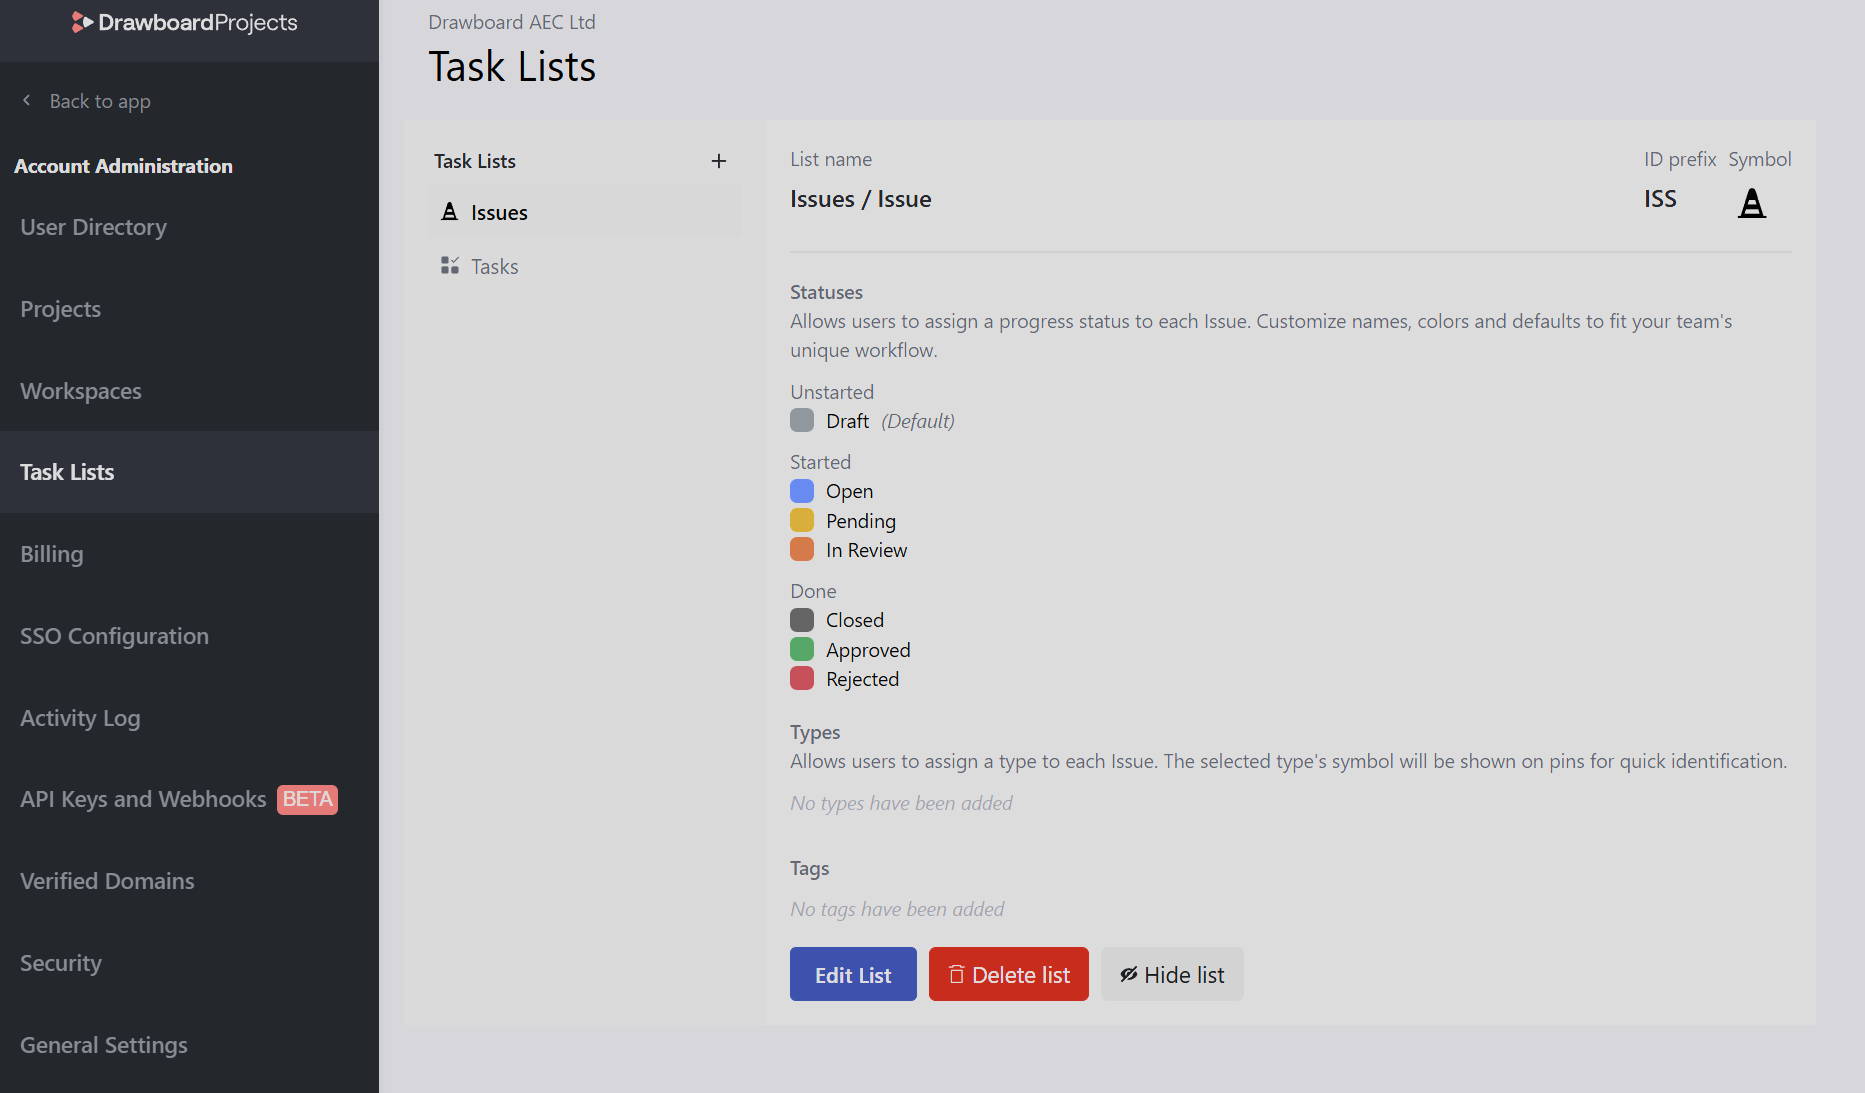
Editing an existing Task List
Select the list you wish to edit and click the Edit List button to enter edit mode. Any changes you make will only be saved after pressing Save list, or if you don't wish to save your changes click Cancel.
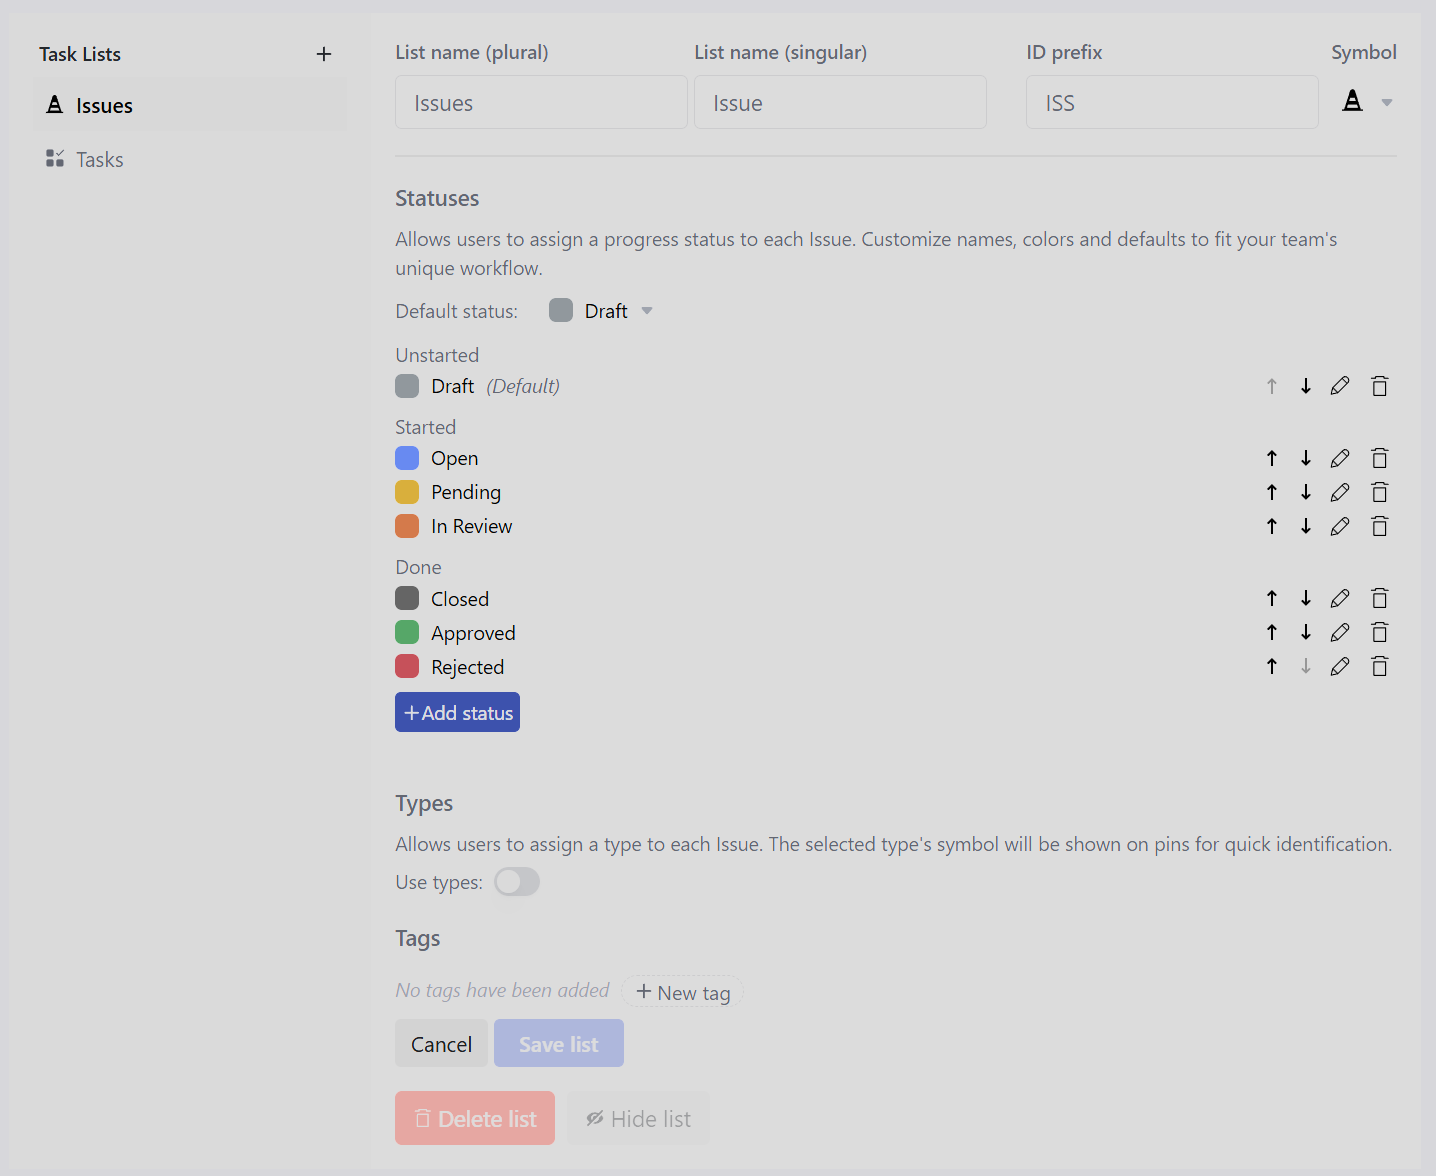
You can enter a new list name - be sure to edit both the plural (e.g. Issues, used to refer to the list as a whole) and singular (e.g. Issue, used to refer to an individual record) names as these are both used across the user interface.
The ID prefix can be changed to any 1-3 character string. The new prefix will be applied to all records in the list (old and new). Changing this does not reset the count or change the ID number of any existing record.
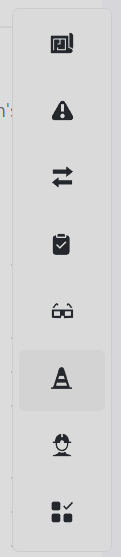
The symbol used on pins can be changed to any of the 8 available options. It's good practice to use different symbols for different lists, to make it obvious when viewing pins on a drawing or document.
Statuses
To better fit your team's unique workflow, you can add, change and remove the statuses available in each Task List.
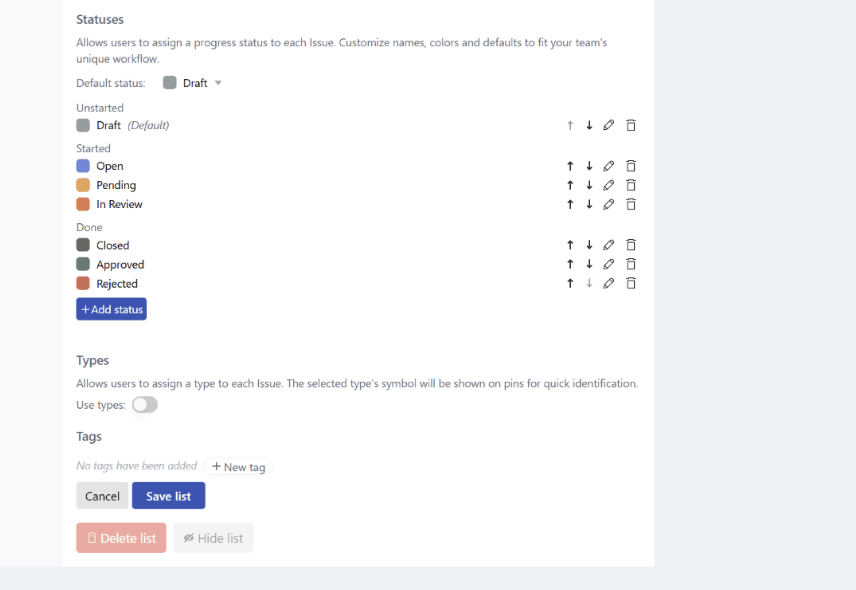
The Default status is the status that will be initially selected when a new record is created in a specific task list, either by dropping a new pin or creating a new record in a list.
The Unstarted, Started and Done workflow states allow you to group your statuses, to make filtering easier and to support the "Show done items" filter on the canvas, which by default hides all pins for records with a "Done" status (e.g. in the example above, all pins with Closed, Approved or Rejected statuses will be hidden by default when viewing a drawing or document).
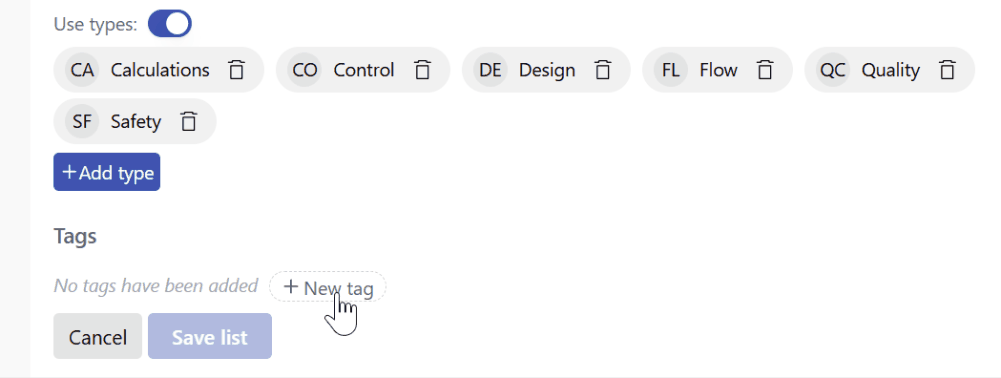
Types
In certain lists and registers (such as Punch Item lists), it's useful to be able to easily categorize and differentiate records, and this is the purpose of Types. Each Type has a name and a 1-2 character moniker which is used on pins instead of the list symbol, for records where a type is selected.
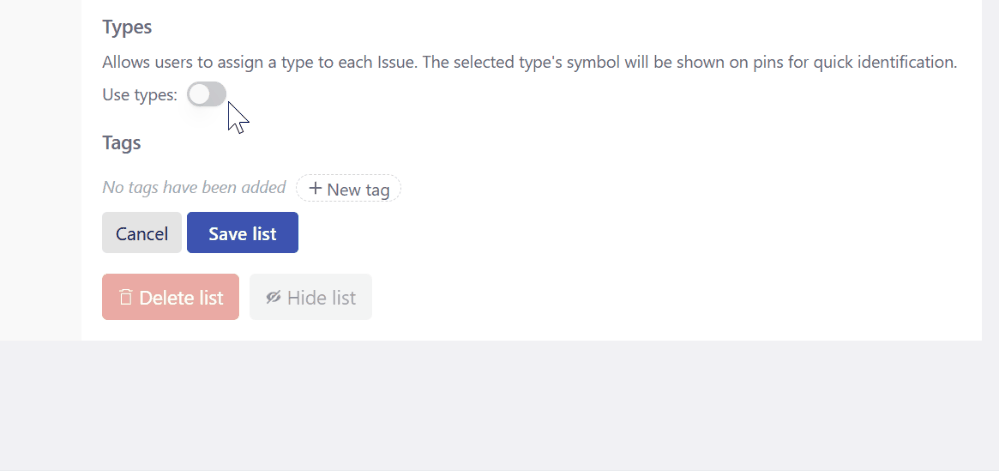
Tags
If your organization often uses the same tags across many projects, they can be entered here and will appear as dropdown values when a user creates a new record in this list. Tags can be used to categorize lists beyond their basic type or status. For example, you could create tags to manage priorities (e.g. 🔥P1 ), organize by milestones (e.g. 75% Review ), or other flags important to your organization (e.g. Lesson learned ).
Creating a new Task List
New Task Lists can be added to even further customize your workflow, either using a template to start or adding a blank list and building a list that matches exactly what you want
To add a new Task List:
- Access the Account Admin portal and navigate to the Task Lists tab
- Click the + button above the list of existing Task Lists
- Select a template from the list and click + Use this template to copy it into a new Task List, which you can further customize before making it available to users, or
- Click + Create blank to create a new empty Task List
- Customize the name, ID prefix, symbol, statuses, types and tags to match your workflow
- Click Save list
- To make this list available to users, click Activate, or leave it in draft so you can make additional changes before making it visible to users.
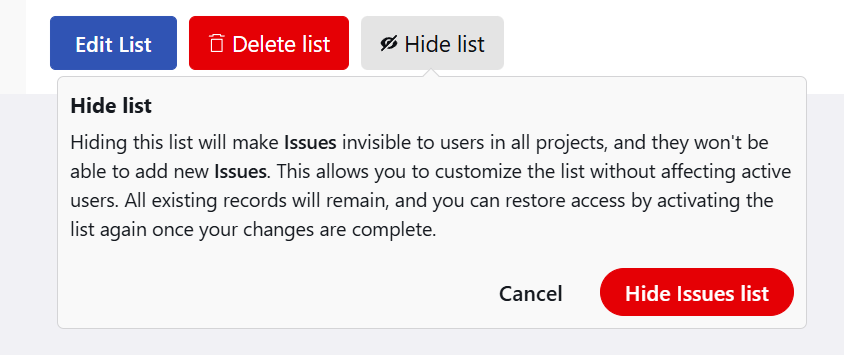
Hiding a Task List
Hiding a Task List remove it from view but does not delete any data. The hidden Task List will no longer appear in the left hand menu when you are viewing a project or the canvas, and the pin tool for this Task List will no longer be available on the canvas.
Hidden lists can be reactivated at any time by an Organization Admin, and they will then be visible and available to all users again.
To hide a Task List, select the list and click the Hide list button.
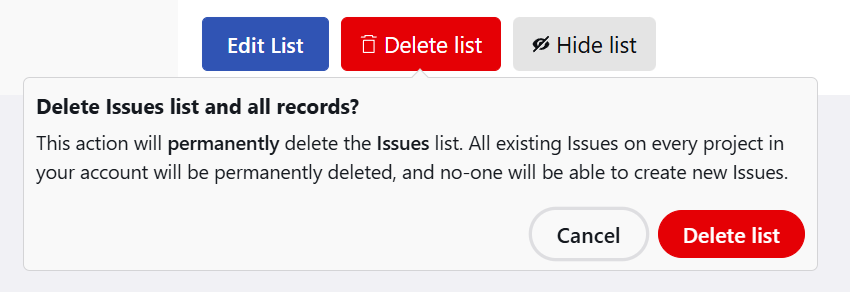
Deleting a Task List
Beware - deleting a Task List permanently deletes ALL records in that list across all projects in your account, including what you may consider historical records on older projects and archived projects, so be completely sure before clicking this button. Hiding a Task List may be a safer option if you do not want to lose important data. For example, if you have old projects that contain Issues you want to be able to refer to in the future, but do not want new projects to have an Issues list, hide the Issues list so it's not available, so records are preserved and it can be activated again in the future should there be a need.
If you wish to permanently delete a Task list and all records in this list across all projects in your account, select the list and click the Delete list button. Users will no longer see this list when viewing a project or the canvas, and the pin tool for this Task List will no longer be available on the canvas.