The Favorites Toolbar in Drawboard PDF for Web helps you keep your most-used tools organized and within easy reach, so you can work more efficiently. With the new Multiple Favorite Toolbars feature, you can now create, save, and switch between several toolbars, each tailored to a different workflow or project.
In this article, we'll guide you through:
- Save and Use multiple favorite toolbars
- Adding tools to a favorite toolbar
- Removing tools from a favorite toolbar
Save and Use multiple favorite toolbars
The Favorites Toolbar lets you keep the tools you use most often organized and accessible. You can create multiple toolbars to match different workflows or projects, switch between them as needed, and store them in your account so they’re available whenever you sign in.
Create a Favorite Toolbar
- Open Drawboard PDF on the Web.
- Click the Toolbar menu
 and select Save as Favorite Toolbar.
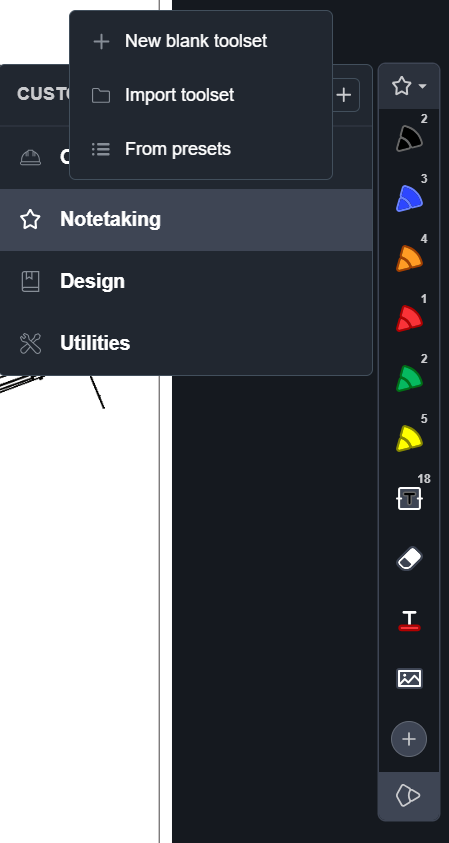
- Choose how you want to create your toolbar:
-
From scratch – design a toolbar exactly how you want it.
-
Using a preset – pick from curated toolbars for industries like Construction or Architecture.
-
Import toolbar – bring in a toolbar you’ve already created from DrawboardPDF
- Give your toolbar a name and save it to your Drawboard account.
- Switch between your favorite toolbars anytime from the Toolbar menu.
Edit a Favorite Toolbar
- Open Drawboard PDF on the Web.
- Click the Toolbar menu
- Select the toolbar you would like to edit.
- Click the edit button

- From here, you can:
-
Delete the toolbar– Remove a toolbar you no longer need.
-
Rename – Update the toolbar name
-
Duplicate – Make a copy of an existing toolbar
-
Export – Download and share a toolbar setup.
- Once you are done, you can hit the done button to save the changes

Adding tools
There are two ways to add tools to the Toolbar:
Clicking the plus button
- Click the '+' button on the bottom of the toolbar
- This will open the tools modal
- Navigate to the tool you wish to add
- Click the '+' button next to the tool
- This will add the tool to your toolbar
- Another modal will appear where you can updated the properties of the tool
Drag and Drop
- Click the '+' button at the bottom of the toolbar
- This will open the tools modal
- Navigate to the tool you wish to add
- Click and hold on to the tool you wish to add
- Drag the tool icon onto the toolbar
- Drop it in the position you would like it to sit
- This will add the tool to your toolbar
- Another modal will appear where you can update the properties of the tool
Removing Tools
There are two ways of removing tools from your toolbar
- Drag and drop in to the trash bin
- Using the three dots menu
Drag and drop
- Click on the tool you would like to remove from the toolbar
- Hold the click and drag the tool
- A red trash bin button will appear at the top of the toolbar
- Drag the tool up to that button
- Once you see an X appear on the trash bin, release the click
- The tool will be removed from the toolbar
Using three dots
- Navigate to the tool bar
- Click on the tool you wish to remove
- Click on the three dots below the tool
- This will launch the properties modal
- In the properties modal click the trash bin
- This will remove the tool from the toolbar